
How To Fit Skirting Boards | DIY
15th Jan 2026
Fitting skirting boards is a job that looks straightforward until you actually start. The basics are simple enough, but watch out for corners that don't meet perfectly at 90 degrees, walls that bow and lean (especially in older homes) and bay windows that curve - an afternoon project can turn into a weekend nightmare!
This guide covers the complete process, from preparation through to the finishing touches, including the techniques you'll need when things don't go to plan.
Tools and materials
Most of these you'll already have or can pick up cheaply.
Essential tools
- Mitre saw or mitre box
- Coping saw
- Measuring tape and pencil
- Spirit level
- Hammer and nail punch
- Drill with appropriate bits
- Pipe and cable detector
- Sanding sponge or sandpaper
Materials
- Skirting boards (order 10% extra)
- Adhesive (Demsun A30 or CT1)
- Screws and wall plugs
- Wood filler
- Decorator's caulk
- Lost-head nails (if nailing)
Safety note: Wear safety goggles when cutting, and use a dust mask when sanding MDF. The fine particles aren't something you want to breathe in.
1. Preparation
Rushing this stage is where most DIY skirting jobs go wrong.
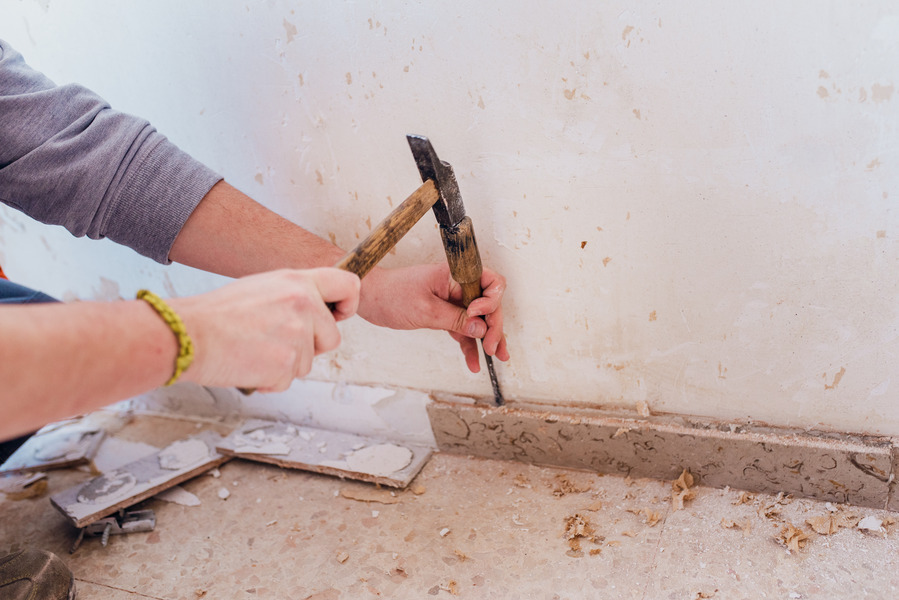
1.1 Removing old skirting
Removing existing skirting needs care to avoid damaging the wall behind. Score along the top edge with a Stanley knife first to break the paint seal, then use a wide bolster chisel and work along the length rather than trying to lever it off in one go.
Fill any holes or cracks in the wall and let them dry completely. Use a pipe and cable detector to check for hidden services before you start drilling or nailing.
Start on the longest wall with internal corners. This gives you a foundation to work from and means your most visible lengths are fitted first.
1.2 Acclimatising your boards
Let new skirting boards acclimatise in your house for 24-48 hours before fitting. This allows the moisture content to equalise with your room conditions, reducing the chance of gaps appearing later as the boards expand or contract.
If you're fitting after new flooring, wait until the floor has fully settled too. Laminate and engineered wood can take a few days to stop moving.
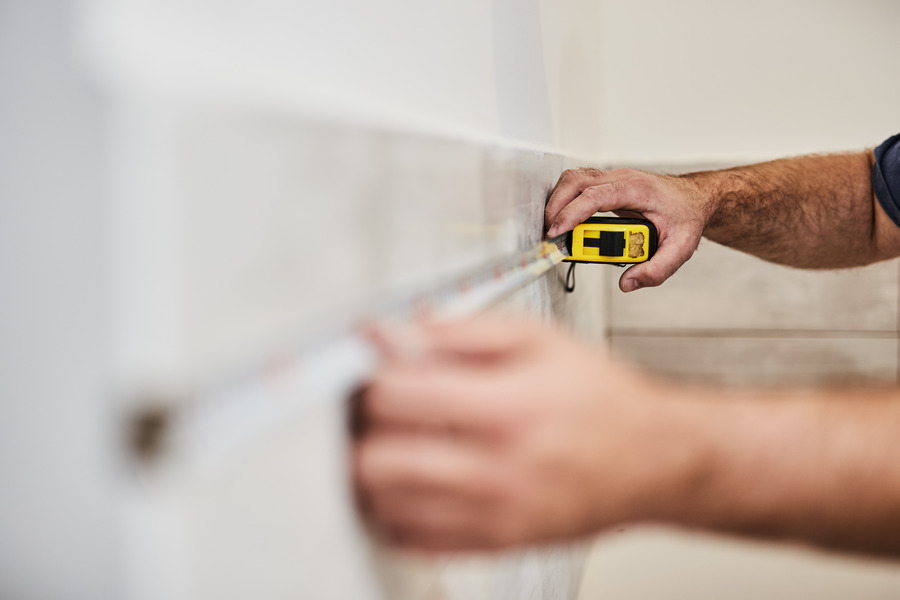
2. Measuring and marking
Measure each wall individually, even if they look the same length. Mark your measurements on the skirting boards clearly, and always mark which end needs which type of cut.
For internal corners, one piece will be cut square while the other gets a scribed joint. For external corners, both pieces need 45-degree mitre cuts. Mark these on your boards before cutting.
When measuring, allow an extra 1-2mm on lengths that will have mitred ends. This gives you adjustment room if the wall isn't perfectly square, and a tight mitre is easier to correct than a gap.
"Measure twice, cut once sounds like a cliché until you've wasted three lengths of skirting on the same wall."
— Common wisdom for good reason
3. Cutting your skirting boards
The quality of your cuts determines how good the finished job looks. Clean, accurate cuts mean tight joints that need minimal filling.
3.1 Mitre cuts for external corners
External corners need two pieces cut at 45 degrees that meet to form a 90-degree corner. If your corner isn't exactly 90 degrees (most aren't), use our mitre angle calculator to work out the correct angle.
Set your mitre saw to the required angle and place the skirting face-up against the fence. Make the cut in one smooth motion. For the adjoining piece, cut in the opposite direction so the two pieces meet.
Protect the face of the skirting by placing a piece of scrap wood between the board and any clamps. Secure the mitre tool in a vice or workbench for accuracy.
3.2 Scribed joints for internal corners
Internal corners work better with a scribed joint than a mitre. One piece butts square into the corner, and the other is cut to fit over the profile of the first piece. This method accommodates corners that aren't perfectly square and doesn't open up if the boards shrink.
How to scribe an internal corner:
- Cut the first piece square and fix it into the corner
- Cut a 45-degree mitre on the end of the second piece
- Use a coping saw to cut along the profile revealed by the mitre, following the contour of the skirting
- Sand the cut edge smooth
- Test the fit and adjust if needed
"This stage can be tricky to get right, so practice on some offcuts first. Check the fit and make adjustments if necessary, using the coping saw and some sandpaper."
— Experienced carpenter
4. Fixing skirting to the wall
There are three main methods for fixing skirting boards: nailing, screwing, and adhesive. Each has its place, and many jobs use a combination.
4.1 Nailing
Traditional method, works well on solid walls and timber studs. Use lost-head nails spaced about 600mm apart. Countersink with a nail punch and fill the holes.
Best for: Solid walls, stud walls where you can hit the timber
4.2 Screwing
More secure than nailing, especially for plasterboard walls. Pre-drill through the skirting to prevent splitting, use wall plugs in masonry, and countersink the screw heads.
Best for: Plasterboard walls, when you need to pull boards tight to uneven walls
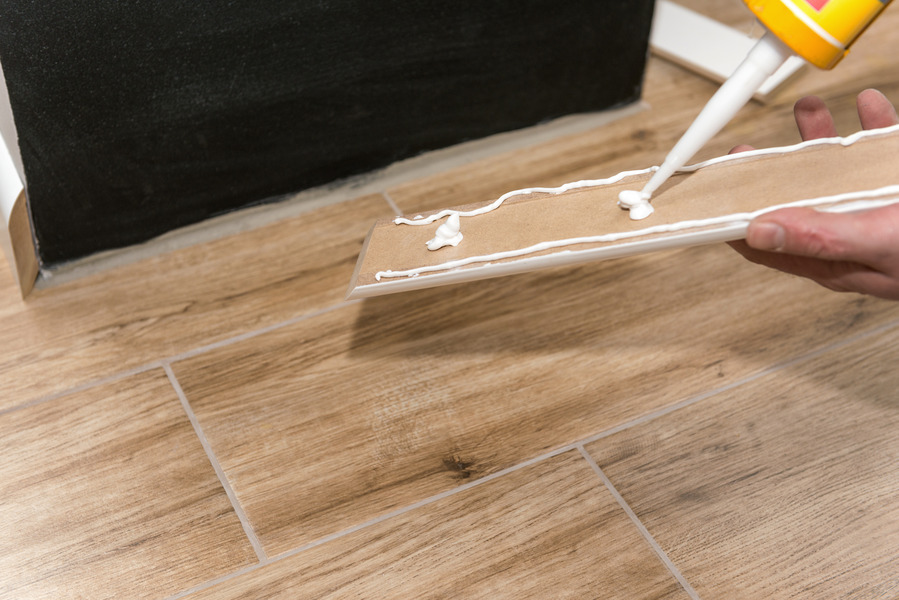
4.3 Adhesive
Apply in a zigzag pattern on the back of the board and press firmly. Use temporary supports while setting. Ideal for damp-proofed walls where you don't want to puncture the membrane.
Best for: Smooth, flat walls; avoiding visible fixings; damp-proofed walls
Always check for pipes and cables before drilling or nailing. A detector costs a few pounds and can save you from an expensive and dangerous mistake.
5. Dealing with uneven walls
Perfect walls are rare. Even new builds often have walls that lean slightly or plaster that's been applied unevenly. The techniques here help you work with what you've got.
5.1 Assessing the problem
Before you start cutting or bodging, spend five minutes understanding what you're dealing with. Hold a piece of skirting against the wall and look for gaps. Use a spirit level to check if the wall is plumb, and a straight edge to reveal any bow.
Gaps up to 3mm are barely noticeable once painted. 3-8mm need attention but are manageable. Over 10mm and you're into more serious work.
5.2 Small gaps: caulk and reduce
For gaps under about 5mm, good caulk work solves most issues. Apply it after fixing the skirting, then smooth with your finger or a caulk shaper. Use white caulk that matches your wall colour rather than the skirting colour.
If a small plaster bulge is stopping the skirting from sitting properly, you can often chip it away with a bolster chisel. Work carefully and check for cables first.
5.3 Scribing the back edge
When gaps are too big for caulk but the wall follows a fairly consistent curve, scribing can give you a much better fit. Hold the skirting against the wall where it naturally wants to sit. Use a compass to trace the wall's shape onto the back of the skirting, then cut along that line with a jigsaw or coping saw.
Set your compass to the widest gap you need to bridge. Keep it level as you run the point along the wall. You're removing material from the back, so small mistakes won't show from the front.
5.4 Forcing with screws
Sometimes the most practical approach is to force the skirting to follow the wall. Drill through the skirting into the wall every 250-300mm. Use good wall plugs and gradually tighten the screws to pull the skirting against the wall. Work along the length, tightening each screw a bit at a time.
For hollow spots behind the skirting, cut small pieces of wood to act as packers. This gives you something solid to screw into and prevents flexing when the skirting gets knocked.
"Use a decent caulk to fill the gap and let it dry for a few days. You may need to repeat. When finally dry, paint the caulk the same colour as the walls to keep the straight line of the skirting."
— Practical advice from the forums
For extremely uneven walls
For severe problems (gaps over 15mm or very irregular walls), consider:
- Having the wall replastered
- Using quadrant moulding to bridge large gaps
- Installing battens first, then fixing skirting to those
- Getting a professional to check for structural issues
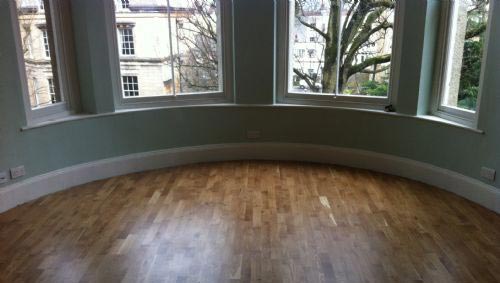
6. Curved walls and bay windows
Bay windows and curved walls need skirting that bends. This is where MDF skirting has a real advantage over hardwood. It offers much more flexibility, especially in thinner profiles.
6.1 Kerf cuts for tight curves
Kerf cutting involves making shallow cuts partway through the back of the skirting to make it more flexible. This is the preferred method for bay windows and other tight curves where the skirting wouldn't naturally bend enough.
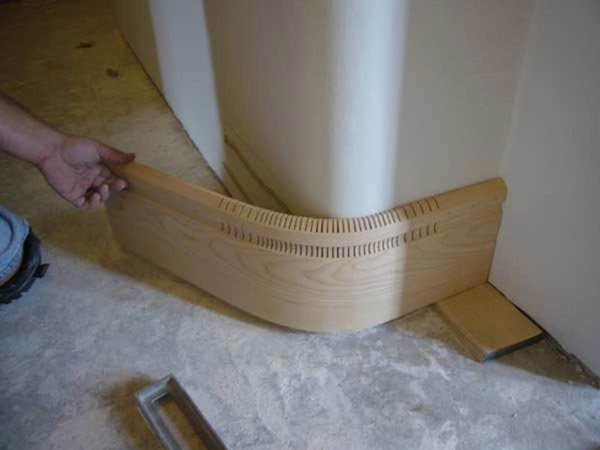
Make cuts every 20-25mm across the back of the board, about half the thickness deep. Start shallow and test as you go. Deepen or add more cuts if needed, but don't overdo it as this weakens the board.
Be careful where you place screws after kerfing. Never screw close to a cut line, or the board may split.
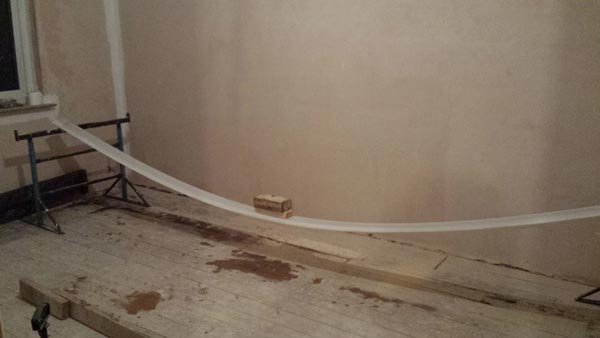
6.2 Weight bending for gentle curves
If you have time and the curve is gentle, you can gradually bend skirting using weight. Rest the board on supports at each end and place weight (a bucket with water or sand works well) in the centre. Add weight gradually over a week, allowing the board to take on the curve naturally.
This gives the cleanest finish since there are no cuts to fill, but requires patience and space to set up. Every piece of wood has a limit, so proceed slowly and don't force it.
Thinner boards (15mm) bend more easily than thicker ones (25mm) without additional work.
6.3 The window seat alternative
If bending skirting around a bay window feels like more trouble than it's worth, consider building a window seat instead. Build the seat out level with the room's walls, and the skirting simply runs straight across the front.
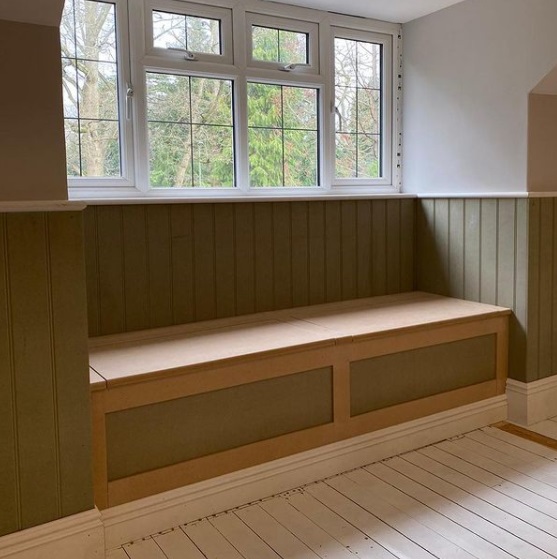
This avoids the bending problem entirely and adds useful seating and storage to the room. Our window boards work well as the seat surface.
Storage hack: A hinged seat lid gives you hidden storage inside the seat as well.
7. Working around obstacles
Radiator pipes and electrical sockets need careful work. Measure precisely and cut neatly, because these areas are often at eye level when you're sitting down.
7.1 Radiator pipes
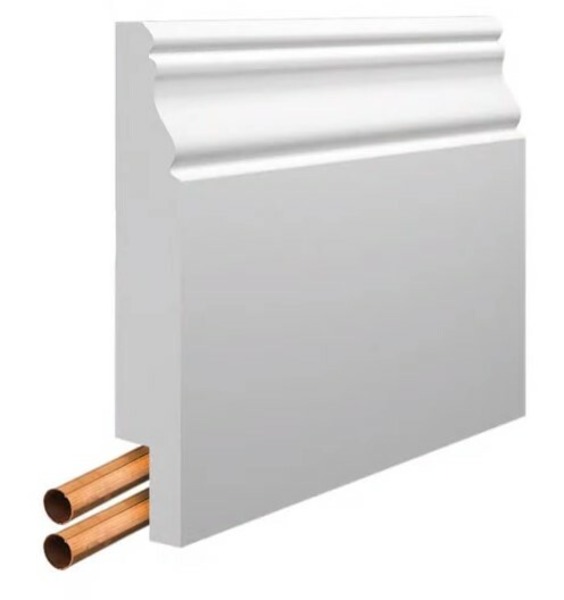
Measure the position and diameter of the pipe, and mark this on your skirting board. Drill a hole slightly larger than the pipe, then cut from the back of the board to the hole to allow the board to slot around the pipe.
If you're fitting skirting with pipes running behind it, consider ordering boards with a rebate option. This gives you a channel on the back that accommodates pipes without any additional cutting.
7.2 Electrical sockets
Mark the socket position and size on your skirting, then cut out the section with a jigsaw or coping saw. Take your time here since these cuts are very visible. Consider adding a socket spacer if the socket sits lower than your new skirting height.
8. Finishing touches
The finishing work often makes the difference between a job that looks professional and one that obviously struggled. Take as much care here as you did with the cutting.
8.1 Filling and sanding
Fill all nail holes, screw holes, and gaps in joints with wood filler. For MDF, use a flexible filler that moves with the material rather than hard wood filler that might crack. Once dry, sand smooth with fine-grit sandpaper.
8.2 Caulking
Apply decorator's caulk along the top edge where the skirting meets the wall. Smooth with a wet finger for a neat finish. For gaps up to about 8mm, apply caulk in two or three passes rather than trying to fill everything at once. Let each layer dry completely before adding the next.
8.3 Painting
If your boards aren't pre-painted, now's the time to paint them. Use masking tape to protect the wall and floor, apply primer if needed, then your chosen paint.
Once furniture is in place, small imperfections become much less noticeable. Don't aim for perfection if good enough will do the job.
Common problems when fitting skirting boards
Gaps in corners
Use wood filler for small gaps. For larger gaps, recut the joint. If the corner isn't 90 degrees, adjust your mitre angle and try again with a fresh piece.
Splitting when nailing
Always pre-drill holes, especially near the ends of boards. Use a nail punch to avoid hammer marks, and don't nail too close to the edge.
Wall plugs pulling out
Try longer screws, add matchsticks to the holes for grip, or use resin fixings. Sometimes the wall just isn't solid enough for screwing. Switch to adhesive or find the studs.
Adhesive not holding
Check the wall is clean and dust-free. Use temporary supports (heavy books, props) until the adhesive cures. Some adhesives need both surfaces to be slightly tacky before pressing together.
Maintenance and care
Regular cleaning keeps skirting looking its best. Dust regularly with a soft cloth or vacuum attachment, and wipe down with a damp cloth and mild detergent for deeper cleaning. Avoid harsh chemicals that could damage the paint.
Keep some matching paint for touch-ups on scuffs and marks. Re-caulk any areas where the caulk has cracked or separated over time.
Frequently asked questions
Do I need to remove old skirting boards before fitting new ones?
Usually yes. Removing old skirting ensures a proper fit and avoids uneven gaps. However, if your old skirting is in reasonable condition and you want a taller profile, skirting board covers can fit over the top.
What type of saw should I use for cutting skirting boards?
A mitre saw or mitre box is ideal for creating precise angles at corners. A coping saw is useful for cutting detailed scribed joints at internal corners. For straight cuts, a hand saw or circular saw works fine.
Can skirting boards bend around bay windows?
Yes, though it requires additional work. MDF bends more easily than hardwood. For tight curves, use kerf cuts on the back of the board. For gentler curves, thinner boards (15mm) may bend enough without cutting. Alternatively, build a window seat so the skirting can run straight across.
How do I deal with very uneven walls?
For small gaps (under 5mm), caulk works well. For larger gaps, scribe the back of the skirting to match the wall contour, or use screws to pull the board against the wall. Severe cases may need the wall replastering or battens fitted first.
Should I paint skirting boards before or after fitting?
It's usually easier to paint after fitting. This ensures a neat finish, especially where caulk meets the wall. You can apply primer and undercoat before fitting if you prefer, then do the topcoat once installed. Use masking tape to protect floors and walls while painting.
How long should skirting boards acclimatise before fitting?
24-48 hours in the room where they'll be fitted. This allows the moisture content to equalise with your room conditions, reducing the chance of gaps appearing later as the boards expand or contract.