
Mitre Angle Calculator | Calculate Miter Angles | 3D Visualiser
5th Dec 2025
Mitre Angle Calculator
Precise angles for perfect joints
How to use the mitre angle calculator
The calculator handles the trigonometry behind mitre joints, giving you exact cutting angles for any corner configuration. Input your measurements and it determines how to cut each board for a perfect fit.
Measure the corner angle
Use an angle finder to measure where your boards will meet. Square corners read 90°, but older houses often have walls that sit at 87° or 93°. Bay window corners typically measure 135°. Enter this figure in the "Joint Angle" field.
Enter board dimensions
Measure the width of each board you're joining. For skirting boards, this is the thickness measurement. The calculator automatically syncs units across all fields when you change one dropdown.
Check the calculated results
The results display the cutting angle for each board. These angles should add up to your original joint angle. The "Mitre Saw Settings" show the complementary angles your saw needs.
Switch to 3D view (optional)
The 3D mode shows how your boards fit together in three dimensions. Add board thickness for realistic proportions. Use the explode view to examine each piece separately.
Equal board widths produce identical mitre angles. Different widths create unequal angles that still sum to your joint angle.
How to calculate mitre angles
The maths behind mitre cuts varies from simple division to complex trigonometry. Three scenarios cover the three most common situations you'll encounter.
1. Equal width boards at 90°
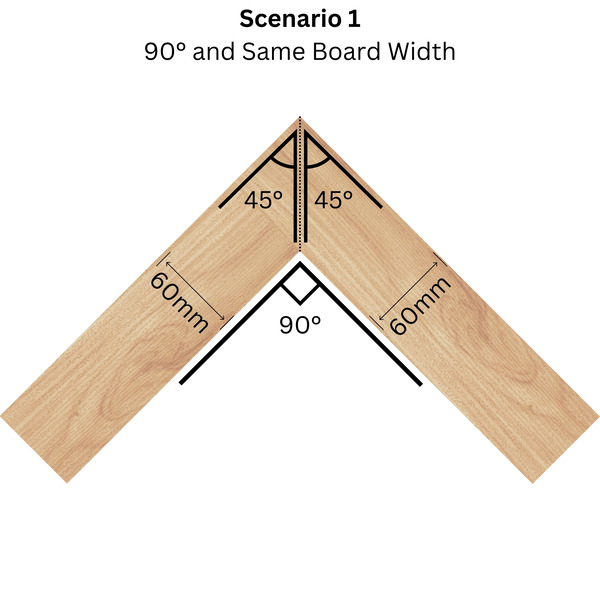
Picture frames work this way. Two boards of identical width meeting at a 90° corner each need 45° mitre cuts. The calculation is straightforward division (whenever you have two boards of the same width - simply halve the joint angle to get the mitre angle).
Formula
90° ÷ 2 pieces = 45° per board
2. Different width boards at 90°
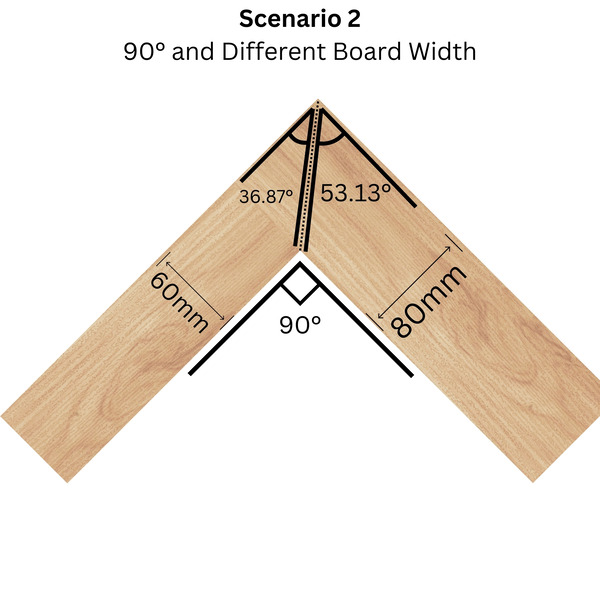
When board widths differ, the angles become unequal. The narrower board gets a smaller angle, the wider board a larger one. This happens because each board effectively takes a percentage of the total joint angle based on its width. This scenario appears regularly when building custom picture frames where the top and bottom rails are wider than the side rails.
Formula
Where arctan is the inverse tangent function and 45° represents the baseline for equal boards. The width ratio adjusts this baseline.
Example: 60mm and 80mm boards
Narrower board: arctan((60 ÷ 80) × tan(45°)) ≈ 36.87°
Wider board: arctan((80 ÷ 60) × tan(45°)) ≈ 53.13°
Verification: 36.87° + 53.13° = 90°
3. Any angle, any width boards
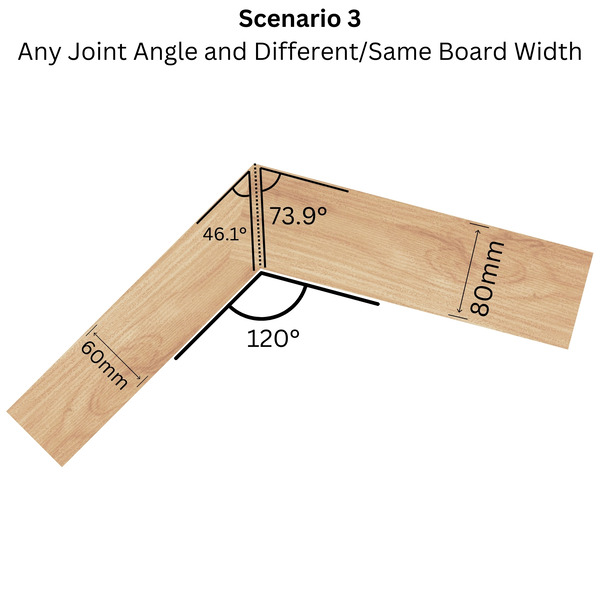
Any combination of joint angle and board widths requires the complete trigonometric formula. This accounts for how sine and cosine functions interact with board width ratios and the desired joint angle.
Complete formula
The formula translates the interplay between board widths, trigonometric functions, and the joint angle into precise cutting angles.
Example: 120° joint with 60mm and 80mm boards
60mm board: arctan((60 × sin(120°)) ÷ (80 + 60 × cos(120°))) × 180 ÷ π ≈ 46.10°
80mm board: arctan((80 × sin(120°)) ÷ (60 + 80 × cos(120°))) × 180 ÷ π ≈ 73.90°
Verification: 46.10° + 73.90° = 120°
Manual calculations become error-prone with complex trigonometry, particularly when converting between degrees and radians. The calculator handles these computations more reliably for practical work.
What is a mitre saw?
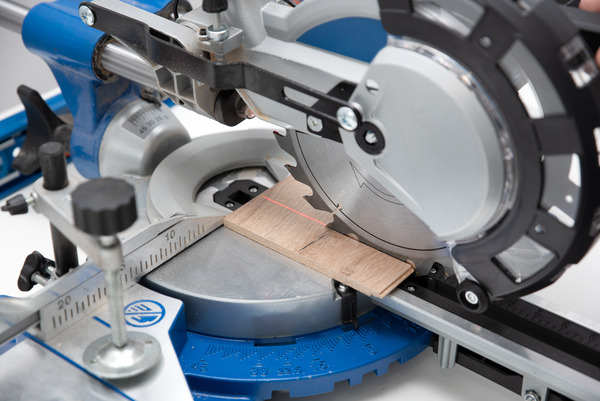
A mitre saw features a circular blade mounted on a pivoting arm that cuts through workpieces held against a fence. Unlike handheld circular saws, the controlled cutting action produces consistently accurate angles.
The saw arm pivots horizontally to set mitre angles and can tilt vertically (on compound models) for bevel cuts. Most saws include detent stops at common angles, 15°, 22.5°, 30°, 45°, that click into position. Custom angles require manual adjustment using the degree scale.
Setting up cuts
Set the saw to the calculated angle using the scale and locking mechanism
Test the setting on scrap material to verify the angle matches your calculation
Position your workpiece firmly against the fence and make the cut with steady downward pressure
Check the joint fit before cutting all pieces - small adjustments beat starting over
Converting to saw settings (complementary angle)
Most mitre saws measure from 0° (which cuts at 90° to the board). The calculator's "Mitre Saw Settings" show the correct dial position.
A 73.9° mitre angle requires setting the saw to 16.1°
Mitre box
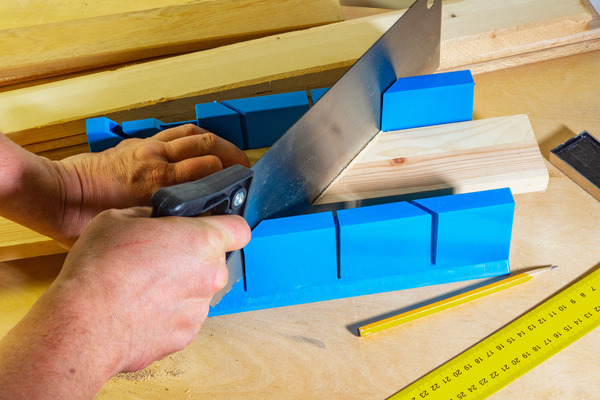
A mitre box guides a hand saw through pre-cut slots at fixed angles. Most boxes offer 45° and 90° cuts, with some including 22.5° options. They're adequate for standard skirting work and basic angles but lack the flexibility for custom angles.
The limitation becomes clear when calculations show you need 37° cuts - a mitre box simply won't accommodate non-standard angles.
What is a mitre cut?
A mitre cut angles across the width of a board to join two pieces at a corner. Rather than cutting square ends and revealing end grain, mitre cuts hide the cut edges for seamless-looking joints.
The cutting angle depends on both the corner angle and board dimensions. Equal-width boards at 90° corners use 45° cuts, but most situations require calculated angles.
Why use mitre joints?
Clean appearance
No visible end grain at corners creates a professional finish
Stronger bonds
Larger glue surface area when properly fitted
Professional standard
Expected finish for quality trim work
Geometric flexibility
Enables non-rectangular shapes and complex angles
Precision becomes critical with mitre joints. A 1° cutting error shows as a visible gap at the corner. This precision requirement is exactly why calculated angles outperform estimates.
Essential considerations
• Mitre cuts go across board width, not length
• Angle accuracy determines joint quality
• Most cuts aren't 45° - depends on corner and dimensions
• Test cuts on scrap material prevent costly mistakes
Where mitre cuts are used
Interior trims
Interior trim work relies heavily on mitre cuts for professional results. Clean joints maintain consistent profile lines around room perimeters without visible end grain.
Skirting boards
External corners almost universally use mitre cuts
Architraves
Door and window casings depend on mitred head joints
Dado and picture rails
Mitre cuts preserve continuous profile lines
Ceiling mouldings
Complex profiles require precise angles for proper alignment
Furniture construction
Cabinet making and furniture work frequently employs mitre joints to create strong corners without visible fasteners or construction lines.
Picture frames
The archetypal mitre joint application
Cabinet face frames
Clean corners without exposed joinery
Decorative boxes
Seamless corner transitions
Table aprons
Joining rails to legs with angled cuts
Geometric applications
Complex geometric shapes depend entirely on calculated mitre angles. Visual estimation becomes impossible beyond simple rectangles.
Hexagonal planters
120° joints requiring 60° mitre cuts for equal sides
Octagonal mirrors
135° joints requiring 67.5° mitre cuts for equal sides
Custom polygons
Any shape using calculated joint angles
Angled shelving
Non-perpendicular joins for contemporary designs
The calculator eliminates guesswork from geometric projects. Input your joint angle and board dimensions to receive exact cutting angles for any polygon configuration.
Screenshots: Mitre Angle Calculator (Desktop & Mobile)
A few views of the calculator in action. Click any image to open the full-size version.


