
What Are Plinth Blocks And Rosette Blocks?
24th Feb 2026
Plinth blocks and rosette blocks are decorative mouldings fitted around doorways, where your skirting boards and architrave meet. They solve a handful of practical problems and, done well, turn an otherwise forgettable junction into something worth noticing.
This guide covers everything in one place: what plinth blocks and rosettes actually do, how to size them, which designs suit which settings, and how to fit them yourself.

What are plinth blocks?
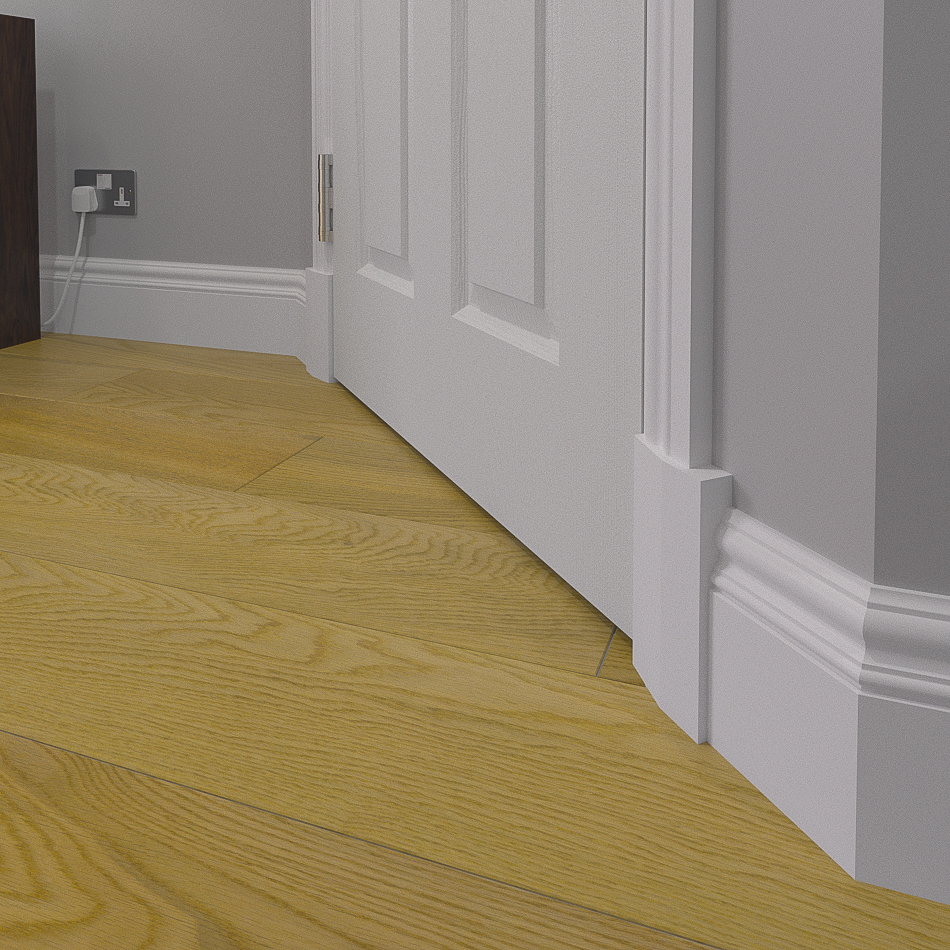
A plinth block is a small rectangular piece of MDF or timber that sits at the base of a door frame, one on each side. It occupies the junction where the skirting board ends and the architrave begins, creating a clean visual break between the two.
Plinth blocks are always slightly taller than the skirting and thicker than both the skirting and architrave. This stepped profile is the whole point: the skirting butts up against one side, the architrave sits on top, and both pieces meet the block with simple straight cuts rather than awkward joints.
You might also hear plinth blocks called base blocks, architrave blocks, or skirting blocks. They all refer to the same thing.
Plinth blocks have been around for centuries. They were originally structural, supporting heavy stone columns. That load-bearing function has long since disappeared, but the decorative and practical role they play around doorways has kept them relevant, particularly in period properties and, increasingly, in modern homes looking to add a bit of character.
What are rosette blocks?
Rosette blocks sit at the opposite end of the architrave, at the top corners of a door frame. A standard door has two rosettes: one in each upper corner, where the vertical architrave legs meet the horizontal head piece.
Like plinth blocks, rosettes are thicker than the architrave so they sit slightly proud. This allows the architrave to butt up against the rosette with a straight cut rather than a 45-degree mitre. The result is a framed, boxed-in look around the top of the doorway.

Rosettes are square, since they need to accommodate architrave coming in from two directions. Historically, they often featured carved floral patterns, which is where the name comes from. Modern rosettes tend to be simpler, with chamfered or bevelled edges rather than ornate carvings.
Plinth blocks and rosettes are often used together, which gives a door frame a complete, symmetrical border from floor to ceiling. But there is no rule that says you must use both. Some homeowners use only plinth blocks at the base, some use only rosettes at the top, and some use the full set.
Why use plinth blocks and rosettes?
There is a practical side to these mouldings that goes beyond looks. Here are the most common reasons people use them.
They simplify installation
Without plinth blocks, the point where skirting meets architrave requires either a scribe cut or a mitre. If the profiles are different shapes or thicknesses, getting a clean joint becomes fiddly. With a plinth block, both the skirting and architrave simply butt up against the block's flat edges with straight cuts. No mitring, no scribing.
The same applies to rosettes. Instead of cutting precise 45-degree mitres where the top and side architrave pieces meet, each piece butts against the rosette. This is especially helpful for anyone doing the job themselves, as mitre joints are one of the trickiest parts of fitting architrave.
They cover gaps and imperfections
Variations in floor levels, imperfect cuts, carpet removal, and material contraction can all leave gaps where the architrave meets the floor. Unlike skirting boards, architrave cannot simply be lowered to close the gap without creating a new problem at the top. A plinth block sits over the bottom of the architrave and bridges the gap to the floor, hiding the issue entirely.

They solve the skirting board cover problem
Skirting board covers fit over existing skirting, which means they are thicker than the originals. If you install covers but leave the original architrave in place, the skirting will protrude past the architrave and look odd. A plinth block, being thicker than both, provides a clean transition between the two different thicknesses.
They help with uneven walls in older homes
In older properties, walls are rarely perfectly flush. This can cause alignment issues when trying to finish skirting boards neatly against architrave, or vice versa. Plinth blocks are thicker than both, so they give you more tolerance. The skirting and architrave can sit slightly differently on the wall and still meet the plinth block cleanly.
Without plinth blocks, the typical solution is to use thicker architrave. But if you would rather keep the same architrave thickness as the skirting, plinth blocks offer an alternative way to achieve a flush finish.
They protect vulnerable corners
The base of a door frame takes a lot of punishment: vacuum cleaner bumps, shoes, furniture being moved through doorways. A plinth block absorbs these knocks instead of the architrave or skirting. And if the block does get damaged, replacing a single small block is far cheaper and easier than replacing an entire length of architrave.
Do you actually need plinth blocks and rosettes?
The honest answer: probably not, strictly speaking. The vast majority of homes in the UK manage perfectly well with skirting boards and architrave alone. Plinth blocks and rosettes are not a structural necessity in modern construction.
That said, there are situations where they go from "nice to have" to genuinely useful.
Plinth blocks are worth considering if:
- You have visible gaps between the architrave and the floor
- You are fitting skirting board covers but keeping existing architrave
- Your walls are uneven and causing alignment issues
- You are using detailed or tall skirting boards and want a proportionate doorway
- You want to add traditional character, particularly in a period property
Rosettes are worth considering if:
- You struggle with mitre cuts at the top of architrave
- You want a framed, traditional look around the full door
- You are already using plinth blocks and want to complete the set
In modern homes with straight, flush walls and matching skirting and architrave thicknesses, plinth blocks are a purely aesthetic choice. There is nothing wrong with that. They are increasingly popular as a way to make otherwise plain doorways a bit more considered.
How many do you need?
The quantities depend on how many doorways you are fitting and whether each doorway is accessible from one side or both.
| Doorway type | Plinth blocks | Rosettes |
|---|---|---|
| Single side only | 2 | 2 |
| Both sides (standard internal door) | 4 | 4 |
| Open archway (both sides) | 4 | 4 |
So for a typical house with, say, 8 internal doors that need fitting on both sides, you would need 32 plinth blocks and 32 rosettes if using the full set. If you are only using plinth blocks, that would be 32 plinth blocks.
Remember, you can use plinth blocks without rosettes, or rosettes without plinth blocks. There is no requirement to use both, though the full set does give the most finished look.
Choosing the right size
Sizing plinth blocks and rosettes is straightforward once you know the rule: the block should be larger than your skirting and architrave in every dimension. This creates the stepped profile that makes the whole thing work.
Plinth block sizing
There are three dimensions to consider: height, thickness, and width. For each one, choose the next size up from your skirting or architrave.
Quick reference: If you are ordering 18mm thick skirting and 70mm wide architrave, a plinth block of 170mm height, 25mm thickness, and 90mm width will cover most standard setups. If you are ordering 25mm thick skirting with 95mm architrave, move up to 30mm thickness and 120mm width on the plinth block.
If you need a size between the standard options, we charge at the next size up. For instance, if you need 230mm tall plinth blocks, you would be charged for the 250mm option with no additional cost. For anything taller than 400mm or wider than 120mm, get in touch and we can price it up.
Rosette block sizing
Rosettes are simpler to size because they are square. The width of the rosette should be wider than your architrave, and the thickness should be greater than your architrave thickness.
| Your architrave | Rosette width | Rosette thickness |
|---|---|---|
| 70mm wide, 18mm thick | 90mm | 25mm |
| 95mm wide, 25mm thick | 120mm | 30mm |
For wider architrave, we can produce rosettes at any width needed. Just get in touch for a quote.
The exception to the "bigger in every way" rule
The plinth block must be thicker than the skirting and architrave. That is non-negotiable, as it is the whole point of having one. However, the height and width are more flexible. If you want the top of the plinth block level with the top of the skirting, or the sides level with the sides of the architrave, that is perfectly fine. Some people prefer a subtler look where the block does not project beyond the other mouldings, acting more as a visual break than a feature piece.
Which design to choose
We offer two plinth block designs and one rosette design. Both plinth designs are deliberately simple so they complement rather than compete with whatever skirting and architrave profiles you are using.


There is no wrong choice here. Both designs are intentionally restrained because the plinth block's job is to create a clean transition, not to become the focal point. Choose whichever you prefer the look of, or whichever better matches the edge detail on your skirting and architrave.
Our Rosette Block P1 follows the same design philosophy as the plinth blocks, with a matching profile that keeps the full set cohesive.
Primed vs unprimed
When ordering, you will choose between a primed or unprimed finish. This applies to both plinth blocks and rosettes.
Primed (recommended)
We apply two coats of water-based primer and sand between coats, so the surface is smooth and ready for your topcoat of paint. Saves you a step and gives a more professional finish.
Unprimed
Bare MDF, ready for you to prime and paint yourself. The main advantage is speed: unprimed items can ship sooner. If you order before midday with Super Fast Delivery, unprimed blocks arrive next working day.
How to install plinth blocks and rosettes
Fitting plinth blocks and rosettes is one of the easier parts of a skirting and architrave job. The key is getting the order right: always fit the blocks first, then the skirting and architrave around them.
Fitting plinth blocks
Position the plinth block at the base of the door frame. The outer edge (closest to the door) should sit a few millimetres away from the edge of the door frame or lining. This small gap prevents the paint finish from cracking when the door is shut or slammed.
Apply a strong construction adhesive (such as Gripfill) to the back of the plinth block. Press it firmly against the wall, making sure the top edge is level.
For extra hold, use a nail gun to pin the block in place while the adhesive sets. Repeat on the other side of the door frame.
The architrave is typically set about 5mm back from the edge of the door frame. Because the plinth block sits closer to the frame edge than this, the architrave naturally appears centred on the plinth block. This is the proportional effect you are aiming for.
Fitting rosette blocks
Use a set square and pencil to extend lines vertically and horizontally from the upper corners of the door frame. These act as positioning guides for the rosette.
Apply adhesive to the back of the rosette and press it into position, aligning it with your pencil marks. Follow up with a nail gun to secure.
Repeat for the other upper corner.
Fitting the architrave between blocks
Once your plinth blocks and rosettes are in place, the architrave fits between them. Measure the distance between the top edge of the plinth block and the bottom edge of the rosette carefully. Each architrave leg slots between its plinth block and rosette with straight cuts at each end, no mitres needed.
The head piece (top length of architrave) runs between the two rosettes in the same way. Accuracy matters here since you are fitting between two fixed points, so measure twice. For a more detailed walkthrough of the architrave itself, see our guide on how to fit architrave.
Finally, fit your skirting boards, butting them straight into the side of each plinth block.
Video guide
For a visual walkthrough of plinth blocks and rosettes, including sizing and installation, have a watch of our video below.
Other uses for plinth blocks and rosettes
Doorways are the primary use, but these blocks turn up in other places too.
Window frames
Rosettes can be used at the corners of window architrave, creating the same framed effect you see around doors. This works particularly well if you are already using rosettes on your doors and want the detailing to carry through the room.
External wall corners
Some people use plinth blocks at external wall corners as decorative features. This creates a period-appropriate look and eliminates the need for mitre cuts where skirting boards meet at external corners. It is a technique you will sometimes see in Victorian and Edwardian properties.
Furniture and wardrobes
Adding a plinth block or rosette detail to freestanding furniture such as wardrobes or drawers can tie them in visually with the room's existing mouldings. It is also a way to refresh an older piece of furniture without replacing it entirely.
Ready to order?
Browse our full range of plinth blocks and rosettes, all manufactured from moisture-resistant MDF with free UK delivery.