Picture Rails | The Complete Guide | Interior Moulding
Posted by Skirting World on 30th Nov 2023
There is a certain charm to picture rails, but this practical design feature that once adorned Victorian state homes, is rarely found in modern British properties.
But picture rails and other decorative wall mouldings are becoming increasingly on-trend, and for both functional and aesthetic purposes, picture rails are finding their way back into the British home.
Read on to learn how picture rails originated as a functional necessity, and then evolved into an aesthetical luxury. We'll go through the various types of picture rails, how to choose the perfect rail for your home and how to fit them!
Picture rails are a type of wall moulding that originated in the 15th century as a way to hang tapestries and other heavy textiles onto walls without damaging the plaster. They were most popular in the Georgian, Victorian and Edwardian periods and can be found in many older homes today as decorative features.
The term "moulding" in the context of interior design refers to a type of decorative trim that is used to cover transitions between surfaces or for decoration. Historically made of wood or plaster, and in modern times made of MDF (Medium-Density Fibreboard) and plastic. Moulding can be installed on walls, ceilings and furniture, you'll often find it in the form of Skirting Boards, which adorn almost every commercial and residential property in the world!
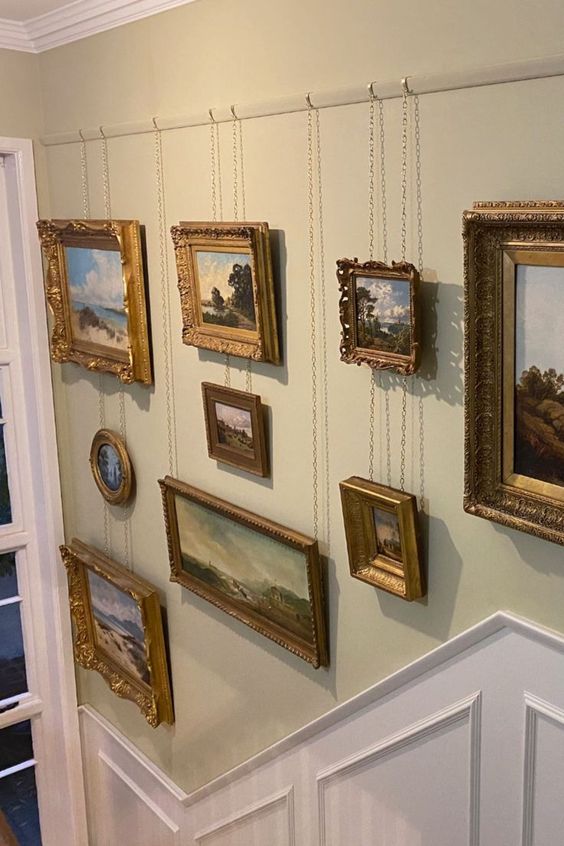
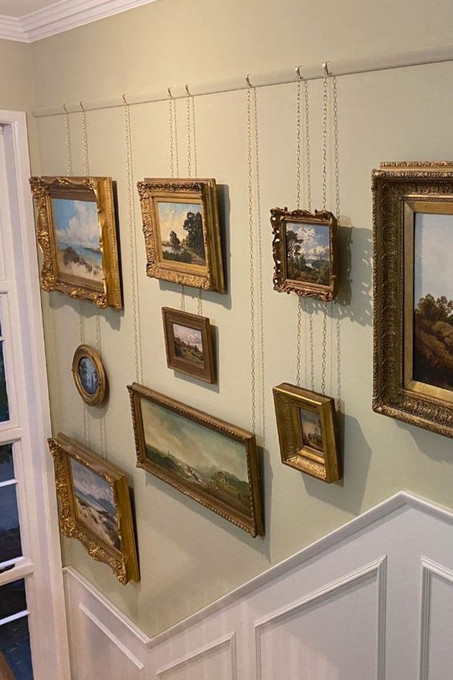
Picture rails are typically installed around the perimeter of a room, and about 6 - 12 inches below the ceiling. They are designed to be strong enough to hold the weight of heavy picture frames and allow for a convenient method of hanging pictures without using nails or screws. They also offer increased flexibility and customisation in the lateral and vertical positioning of artwork.
How Exactly Do Picture Rails Work?
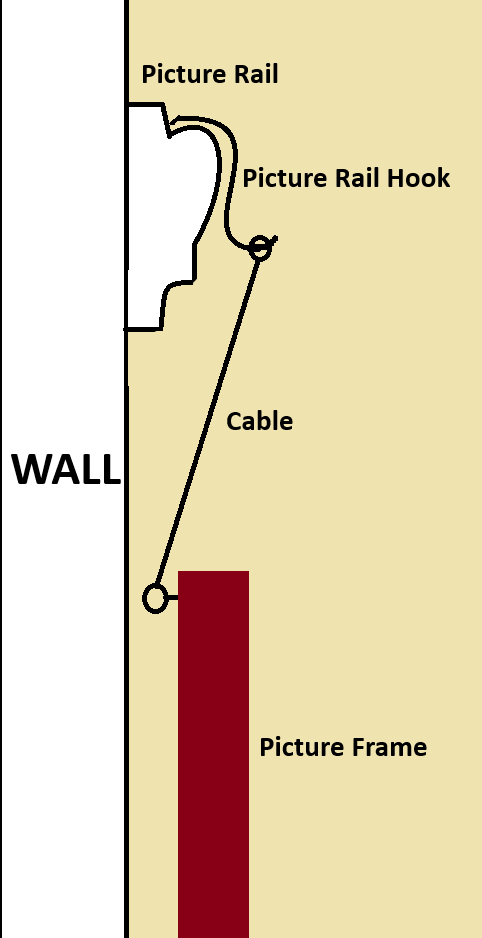
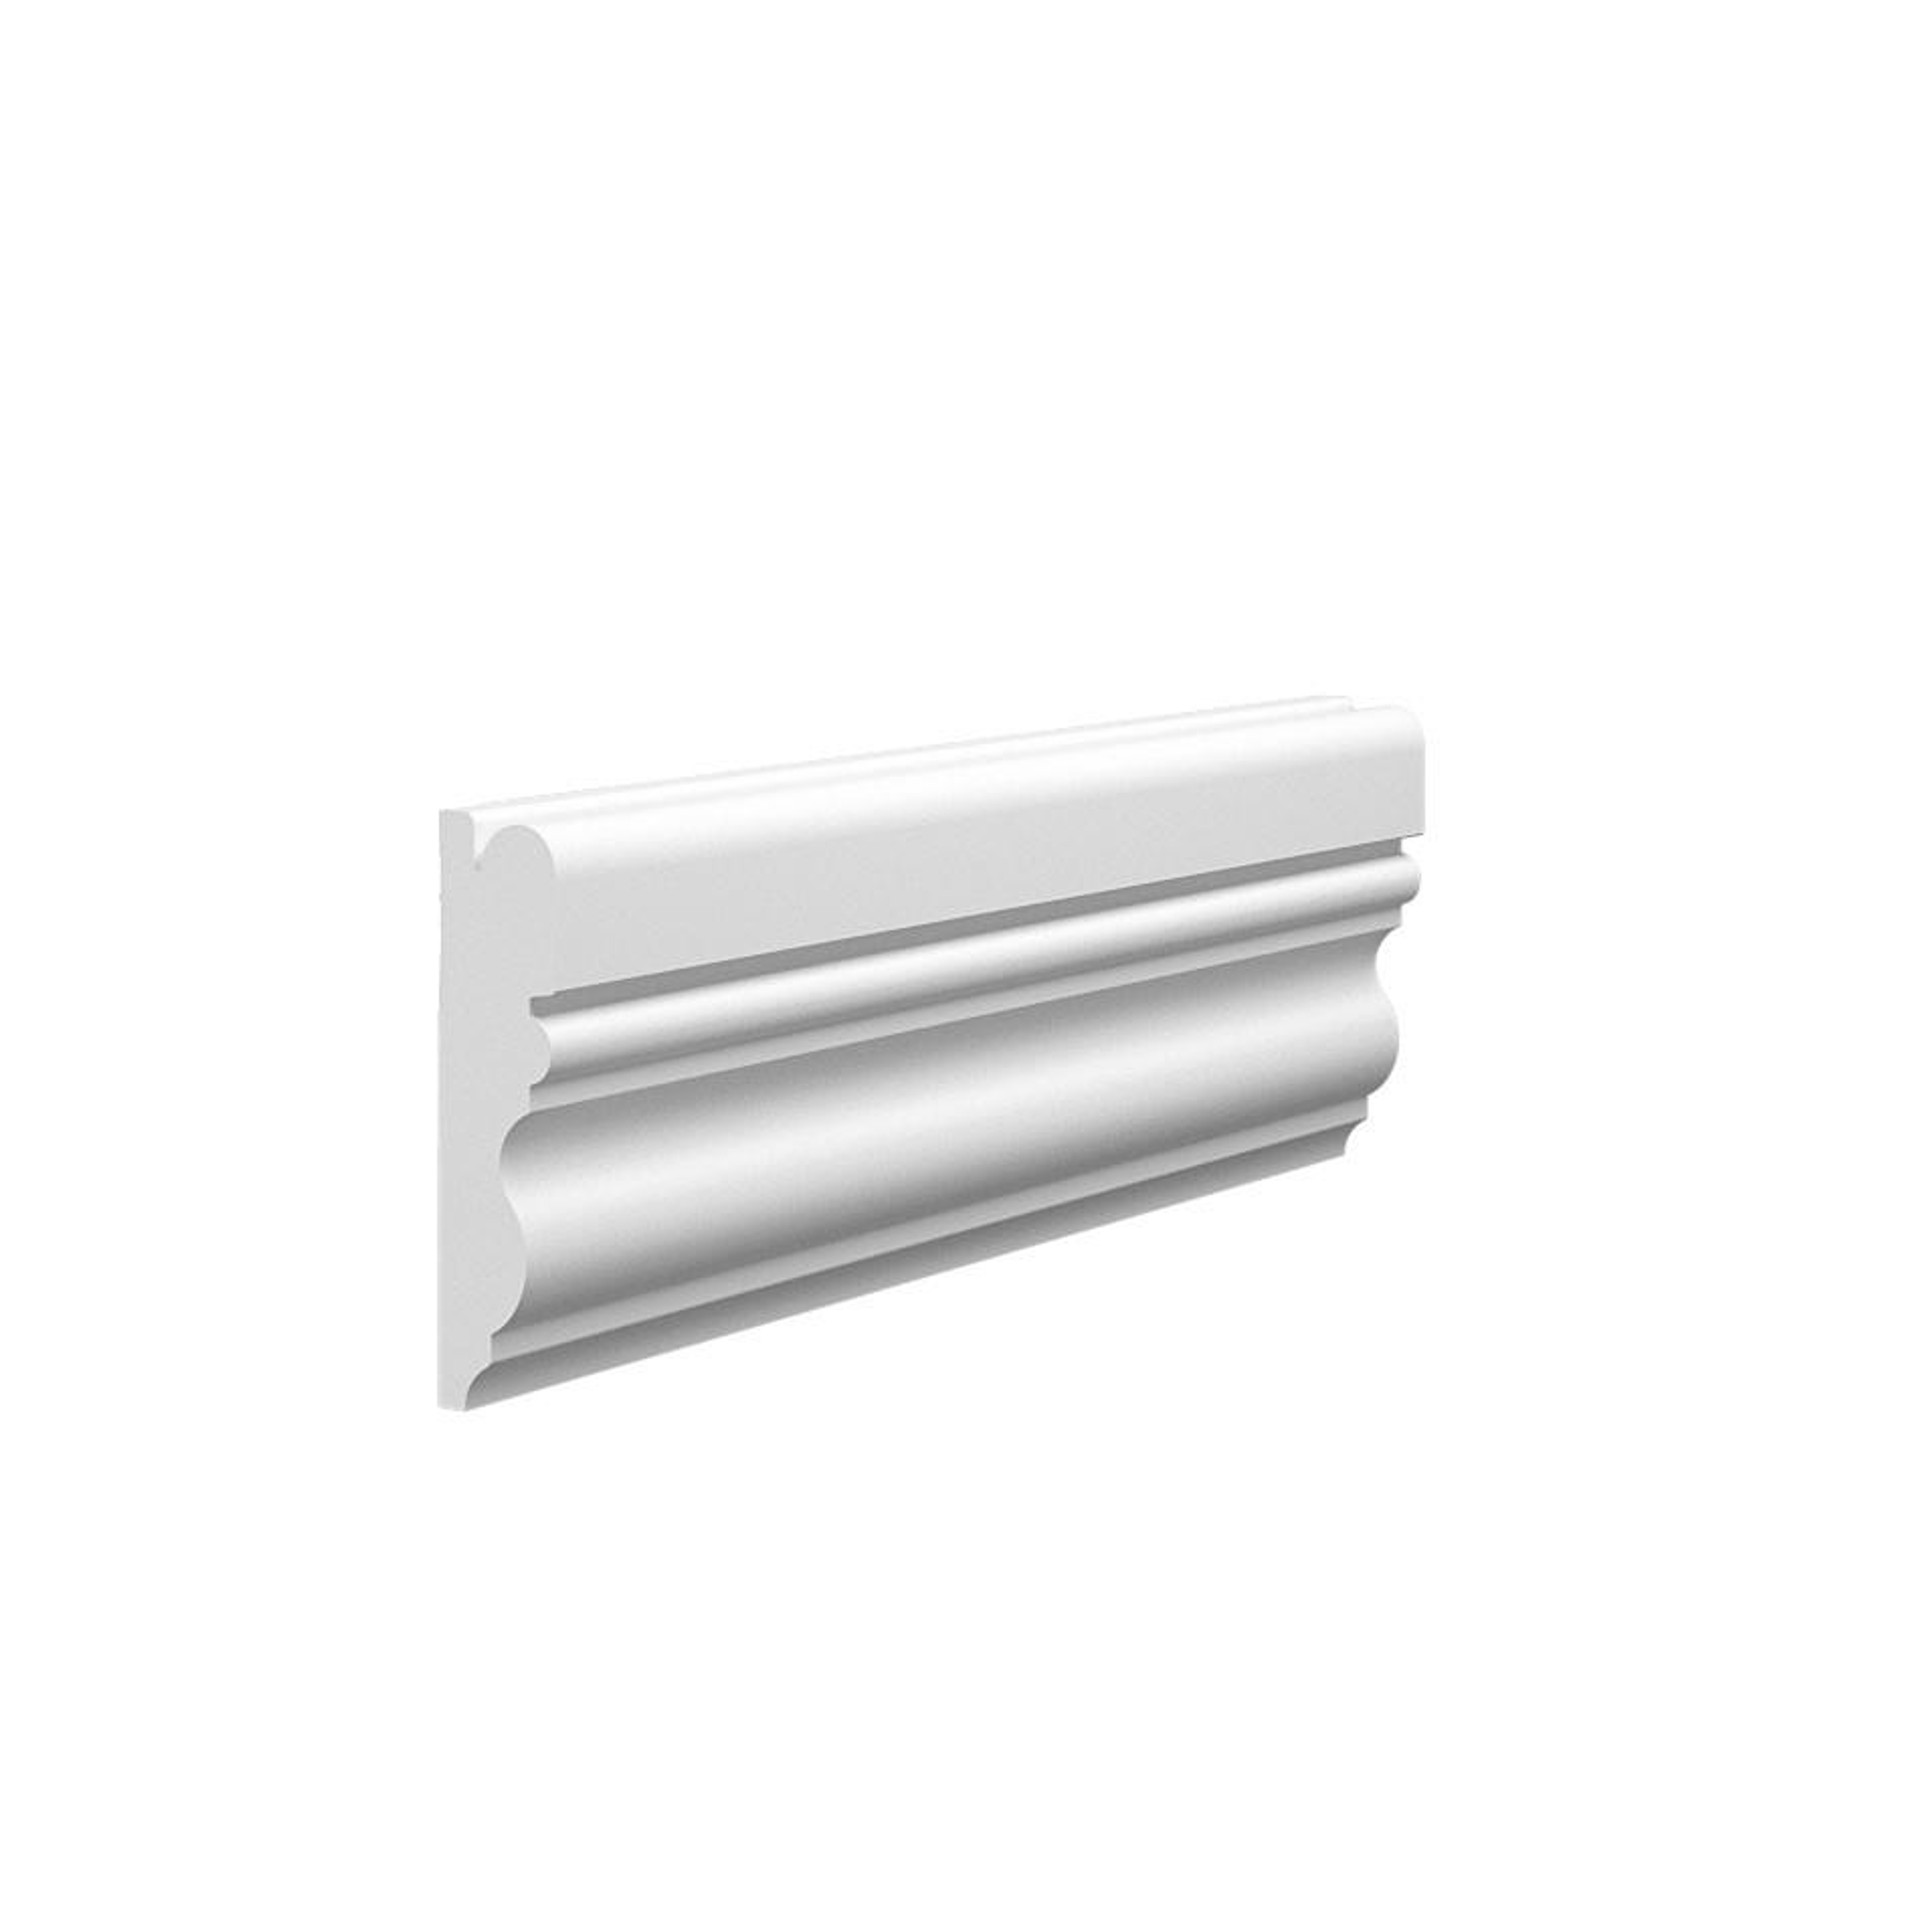
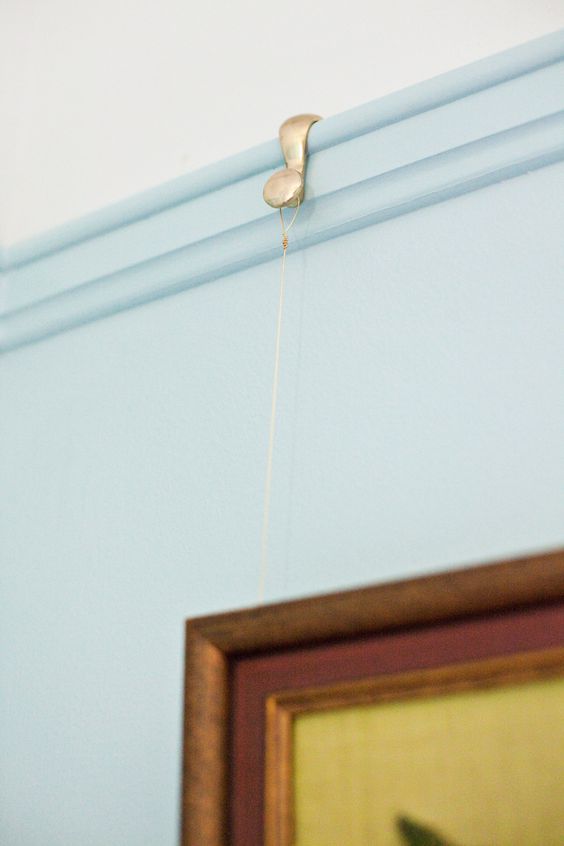
The curved shape of the picture railing creates a raised overhanging lip along the top edge, that creates a cradle-like fit for picture hooks. When pictures or mirrors are to be hung, small hooks are fitted over the lip and drop down to rest their stems in the empty space under this overhang. The lip supports the weight of the hanging object(s).
Meanwhile, the hook stems slide freely along the smooth inner track allowing easy lateral repositioning without needing to drill new holes. Some rails may have a deeper channel to securely hold thicker gauge picture wire as well. This shape and form essentially provides spaces to insert hanging hardware that can then move laterally with ease.
So in essence, the protruding shelf-like overhanging lip and channel provide both a solid anchor for hooks to cling to and a flat track for their stems to travel horizontally across. This enables flexible picture hanging positions.
Historical Significance of Picture Rails
The original picture rails can be traced back to 15th century homes in England and France as a practical and convenient feature. Tapestries and other textiles were hung from picture rails to avoid damaging plastered walls.
Over time, picture rails evolved from purely functional elements to decorative features, incorporating intricate designs and patterns that complemented the architectural styles of the time.
In British residential homes, picture rails were once as common as skirting boards, however during the turbulent 1970s, amidst the decline of manufacturing and rise of minimalist open-plan design styles, picture rails began disappearing from interior walls. In favour of clean lines and clutter-free spaces, picture rails fell out of favour, and ornamental detailing became incompatible with the increased use of drywall, larger artwork pieces which required more secure hanging methods and built-in shelving and cabinetry.
Georgian Era Picture Rails (1714-1837)
- Emerged as simple rectangular mouldings near ceiling
- Served practical purpose of hanging paintings
- Popularized in ornate halls and parlours
- Matched symmetrical Georgian aesthetics
Victorian Era Picture Rails (1837-1901)
- Highly decorated rails complemented Victorian style
- Displayed elaborate artwork and painting collections
- Enabled rearrangement of densely filled walls
- Symbol of cultural pursuit of acquiring visual arts
Edwardian Era Picture Rails (1901-1914)
- Persisted as common feature in early 20th century
- Retained decorative moulding styles from Victoria era
- Continued displaying paintings within homes
- Represented transition to cleaner and simpler interiors
Modern Period Picture Rails
- Use dwindled due to minimalist trends and removable adhesives
- Sometimes installed today for functional purposes in niche applications
- Can be plain contemporary horizontals without ornamentation
- Offer modern way to arrange artwork flexibly without nail holes
- Provide design interest blending old and new interior aesthetics
Types of Picture Rails
Picture rails come in various styles and materials, each offering unique aesthetic and functional benefits. Whether renovating a period property or adding a classic touch to a modern home, you'll find a picture rail to suit your needs.
Wood Picture Rail
- Made of wood materials like pine or oak. Can have intricate carved decorative profiles.
- Screwed directly into wall studs for security to hold medium to heavy frames. Matches wood trim.
- Best for traditional formal rooms and mixed material spaces.
MDF Picture Rail
- Composed of moulded medium density fibreboard into classic or modern shapes. Economical material.
- Lighter weight than wood rails but still provides enough support for most picture frames with proper installation.
- Tends to be used in more casual, contemporary, or transitional interior room styles.
Metal Picture Railings
- Aluminium or steel rails and brackets making up a metal framework hanging on the wall.
- Holds a suspended wire tightly in place; pictures have hanging hooks that easily slide horizontally along wire.
- Often seen in modern industrial lofts, sleek galleries, or to align multiple smaller prints.
Brass Picture Rail
- Brass moulding or decorative brass cap atop rail brings an elegant finish.
- Beautiful accent that enhances traditional to contemporary spaces with its luxe gold shine.
- At home in stylish living rooms, hallways, studies or salons.
Plastic/PVC Picture Rail
- Made completely of plastic/PVC moulding or has plastic incorporated rather than wood. Innovative emerging option.
- Provides a budget-friendly alternative that's moisture-resistant and easy to wipe clean.
- Ideal for bathrooms, laundry rooms, basements, kids' rooms, rentals etc where traditional rails aren't suitable.
How To Fit Picture Rails On Your Wall
Installing picture rails is a straightforward process that can significantly enhance the aesthetic of any room. Here's a step-by-step guide to help you install picture rails efficiently and securely.
Tools and Materials
- Picture Rail Moulding
- Screws / Adhesive
- Spirit Level / Laser Level
- Hammer / Nail Gun
- Stud finder (optional)
- Ladder
- Hand saw + Coping saw + Mitre Box
1. Calculate the ideal picture rail height
First go to our handy Picture Rail Height Calculator to find out the perfect height for installation.
- Traditionally Picture Rails are placed 6 - 12 inches below the ceiling.
- Consider your rooms proportions and aesthetics.
- Higher for rooms with higher ceilings.
- Match the existing height if you're replacing old rails.
2. Draw guidelines on your wall
- Using your tape measure, measure up to your desired height from the floor and mark with a pencil.
- Mark your wall with short horizontal dashes at regular intervals along the wall and in the corners.
- Continue marking around the room until the walls are fully marked.
- Double check each guideline with your spirit level to ensure they are perfectly level.
Pro Tip: Use your spirit level as a straightedge to trace the line. Secure the level against the wall with the top edge just below the picture rail height. Let the top of the level guide your pencil along the wall to create a perfectly level line.
3. Prepare the first section
Now that you have a clear guideline to work with, we can prepare the first length of picture rail.
- Measure the first section of wall and cut the picture rail to length.
If the picture rail is not long enough to reach the end of the wall, you can join multiple pieces together. To use the least amount of pieces, start by measuring the longest length that will fit the wall. Then, cut the remaining pieces to size.
- The ends of your picture rail will need an internal or external mitre when they meet a corner, you can follow our internal mitring and external mitring guides for skirting boards, the same method applies to picture rails.
- Ensure the mitred end is flush with the wall corner.
4. Fix the first section to the wall
- Position the first picture rail piece against the guideline you made earlier.
- Apply a small amount of adhesive to the rear of the picture rail and gently push against the guideline with the help of your spirit level.
- Using your spirit level, ensure that the picture rail is perfectly level, you can adjust it slightly whilst the adhesive has not yet set.
- When the picture rail is perfectly level, fix it to the wall with nails, use your hammer or nail gun to position a nail roughly every 500mm.
5. Preparing and fixing the second section
- Hold the end of the second piece of picture rail up to the end of the first piece, ensuring that the profiles are aligned.
- Mark the end of the second piece of picture rail with a pencil at a 45-degree angle to the edge of the picture rail.
- Use your mitre saw to cut the marked end at a 45-degree angle.
- Then use your coping saw to cut away the profile of the second piece, following the line of the pencil mark. This ensures it fits over the first piece.
- Smooth out the edges of the cut using a file or sandpaper.
- Dry fit the second piece of picture rail to the wall to ensure a good fit. If the fit is good, you can go ahead and fix it to the wall using the previous method,
6. Install the remaining picture rails.
- Repeat steps 3-5 for each remaining section of picture rail.
7. Finishing touches.
- Fill any nail holes with wood filler and sand the surface smooth.
- Paint or stain the picture rails to match the rest of your décor.
Choosing the Perfect Picture Rail for Your Home
When it comes to selecting a picture rail, it's essential to consider not only the style and functionality but also how it complements your interior design and practical needs. Here's an in-depth guide to help you choose a picture rail that's just right for your space.
Your Home's Architectural Style
Start by considering the architectural style of your home. Is it a period property with rich historical features, or a new build with minimalist tendencies? For a classic Victorian or Georgian home, ornate wooden rails can accentuate historical details and a metal raise can offer classic brass accents. In contrast, contemporary spaces often benefit from the clean lines of a Bullnose picture rail, offering a modern twist to traditional picture hanging. Our Lambs Tongue picture rail is a classic.
Material Selection
The material of your picture rail impacts both its look and longevity. Unfinished wooden rails bring warmth and can be tailored to your interior palette with paint or varnish. However for a cheaper and more durable painted finish, choose MDF, like the options available at Skirting World, which provide a smooth finish with minimal upkeep and moisture-resistant properties.
Metal rails, especially sleek aluminium or classic brass, add a contemporary or classical edge suitable for modern and classic art collections.
Sizing Up: Proportions and Weight Considerations
Consider the scale of your rooms when selecting a rail. In larger rooms with high ceilings, a broader rail can make a bold statement without overpowering the space. For smaller rooms, a slender rail maintains balance. Importantly, ensure the rail you choose can support the weight of your artwork. Heavier pieces may need a more robust rail system, so always check the weight specifications.
How Much Weight Can Picture Rails Hold?
The amount of weight picture rails can hold depends on several factors:
- Rail material - Wood rails are capable of holding 10-15 kg per linear metre on average when properly installed into wall studs. Metal rails hold more, upwards of 30 kg depending on mounting method. More lightweight MDF or plastic rails typically hold 5-7 kg.
- Mounting method - Rails firmly screwed into the wall studs can support much more than just plasterboard alone. Using appropriate anchors for stud-less hanging also boosts capacity. Proper technique is key.
- Rail dimensions - Larger profile rails with deeper lips or tracks provide more surface area for hooks to grab and distribute weight. So rail size correlates with strength for the most part.
- Use of safety cables - Securing very heavy mirrors/art over 15 kg with thin aircraft cables tied to screw eyes provides extra insurance so the rails themselves don't have to bear all hanging weight.
- Hook type - Not all picture hooks are rated equal. Styles made from thicker gauge metal with enclosing cups or latching mechanisms can hang more without pulling off rails suddenly.
In general, a well-installed classic wood rail fastened securely into wall studs every 500-750 mm should safely hold around 12-15 kg of artwork or mirrors per 1 metre span.
Picture Rail Hooks
Picture rail hooks are an essential hardware component that serve as the link between hanging wires, chains, or cords and the picture rail itself. There is a wide variety available to suit any picture rail setup.
- Basic Hooks - The most common type. These feature a horizontal straight bar that fits over the lip of the picture rail, suspended by a short vertical stem. The stem allows sliding horizontally once fitted on the rail. Available in finishes like brass, black, white, etc.
- Design Hooks - Similar shape but with decorative embellishments on the horizontal bar and lip section. Styles can be antique, floral, curved, geometric and more. Provides visual interest.
- Cup Hooks - Instead of an open horizontal bar, these have a half-cup shape that fully encloses the lip of the rail. Prevents side-to-side movement ensuring pictures stay centred on walls.
- Safety Hooks - Have a spring-loaded clasp mechanism on both ends of the horizontal bar to firmly grip around the lip and prevent sudden detachment. For heavy mirrors/artwork.
- Rotating Hooks - Circular swivelling vertical hooks allow pictures to turn side-to-side freely without unhanging. Makes viewing angles adjustable.
- Double Hooks - Used to hang extra wide frames. Have dual horizontal bars joined by a vertical neck to spread weight over more rail space for stability.
- Concealed Hooks - For a cleaner modern look, these hide behind frames. Just a central vertical stem sticks out that latches over the rail's back edge.
So in summary, picture rail hooks help facilitate the adjustable hanging system. Pick hooks that functionally support frames' weight and match their size too.
Picture Rail FAQs
How to Hang Pictures from a Picture Rail?
Hanging pictures from a picture rail is simple. Attach hooks that fit snugly over the rail, then hang your artwork using wires or cords attached to these hooks. The height can easily be adjusted, and pictures can be moved horizontally without damaging the walls, offering a flexible and elegant display solution.
How to Put Up a Picture Rail?
Putting up a picture rail involves measuring the wall, cutting the rail to the correct length, and securely attaching it to the wall. Use a level to ensure it's straight, and secure the rail into the wall studs or use wall anchors for plaster walls. It's a straightforward process that can be completed with basic DIY tools.
Are Picture Rails Old Fashioned?
Picture rails, while rooted in tradition, are far from old-fashioned. They have seen a resurgence in modern interior design due to their practicality and vintage charm. They provide an elegant solution for hanging artwork and add a decorative element that complements both classic and contemporary styles.
How Do Picture Rails Work?
Picture rails work by providing a secure ledge from which to hang pictures. They have a lip or groove that allows hooks to latch on securely. Wires or cords from picture frames hang from these hooks, making it easy to adjust and rearrange artwork without putting holes in your walls.
Do You Paint Above the Picture Rail?
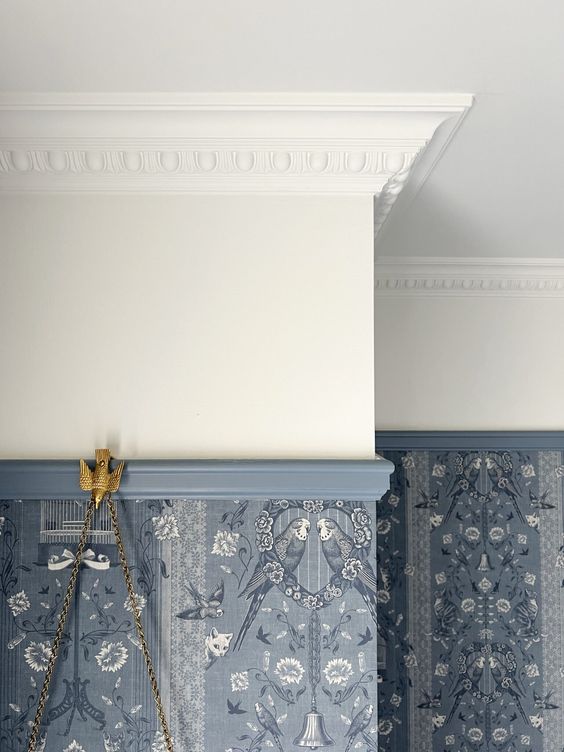
Painting above the picture rail depends on your design preference. Some choose a contrasting colour for a bold statement, while others prefer a seamless look with the same colour as the rest of the wall. Painting above the rail can create a distinct visual zone, highlighting the ceiling or creating a cosy atmosphere.
How Much Weight Can a Picture Rail Hold?
The weight a picture rail can hold depends on its material and how it's installed. Solid wood and metal rails, when properly installed into wall studs, can typically support heavier frames. Always check the manufacturer's guidelines and consider the strength of the wall and fixings to avoid overloading.
How to Attach a Picture Rail to a Brick Wall?
Attaching a picture rail to a brick wall requires robust fixings like heavy-duty wall plugs and screws. Drill holes into the brick, insert the wall plugs, and then screw the rail securely into place. It's important to use the correct drill bit and ensure that the rail is level before fully securing it.
How to Fit Picture Rail Corners?
Fitting picture rail corners involves cutting the ends of the rails at a 45-degree angle so they neatly join at the corner. This mitre cut can be done using a mitre box and saw. For a professional finish, sand down the cut edges before joining them together, ensuring they align perfectly for a seamless corner.
How to Remove Picture Rail?
To remove a picture rail, carefully wedge a flat pry bar or crowbar between the rail and the wall. Gently apply pressure to avoid damaging the wall. Work along the rail, loosening it bit by bit. Once it's removed, patch any holes or marks left on the wall for a clean finish.


