


How To Paint Skirting Boards | Professional Clean Cut Method
Posted by Lee Watkinson on 17th Oct 2025
Painting skirting boards well means getting the preparation right and applying paint in thin, even coats. Most problems happen because surfaces weren't properly cleaned or sanded, or because paint was applied too thickly.
This guide covers the complete process, from preparing your boards through to achieving a professional finish that lasts.
Tools and materials
You need the right tools for a clean finish. Using the wrong brush or skipping proper sandpaper makes the job harder and the results worse.
What you need
- Sandpaper - medium grit (120) and fine grit (220)
- Sugar soap or TSP solution
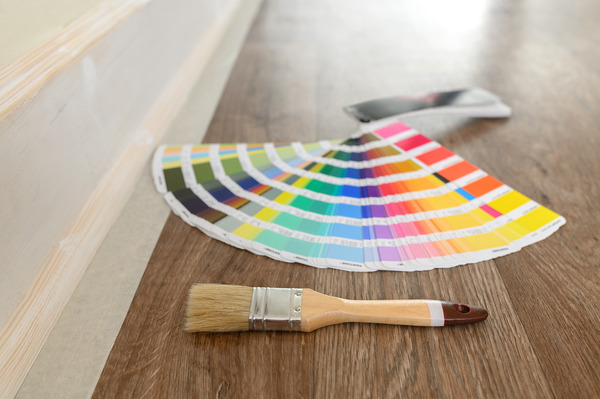
- Paint brush - 2-inch angled brush (synthetic for water-based, natural bristle for oil-based)
- Low-tack painter's tape
- Dust sheets
- Primer (for bare or untreated wood)
- Paint - gloss, satin, or eggshell finish
- Clean cloths or tack cloth
Synthetic brushes work better with water-based paints because natural bristles go limp when wet. Natural bristles hold oil-based paint better and create a smoother finish with those formulas.
1. Preparation
Preparation determines how well your paint adheres and how long the finish lasts. Most paint failures trace back to poor surface prep.
1. Clear the area
Move furniture away from walls to create access around the full perimeter. Lay dust sheets along the floor to protect from paint drips and sanding dust.
2. Clean thoroughly
Clean the skirting boards with sugar soap or TSP solution to remove grease, dirt, and dust. Kitchen skirting boards often have a film of cooking grease that stops paint adhering properly.
Wipe down with clean water after using sugar soap, then let everything dry completely before moving to the next step.
3. Sand the surface
Sand the surface with 120-grit sandpaper to remove old paint and create a smooth base. This step is especially important if you're painting over gloss - the shiny surface needs roughening so new paint can grip.
Switch to 220-grit sandpaper for a finer finish. Sand with the grain if you're working with visible wood patterns. Use a tack cloth to remove all sanding dust.
Painting over existing gloss? Gloss paint needs more thorough sanding because the smooth surface resists adhesion. See our dedicated guide on how to paint over gloss skirting boards for the specific preparation needed.
2. Priming
Bare or untreated wood needs primer. If you're painting over existing paint in good condition, you can skip this step and go straight to painting.
Use a high-adhesion primer for bare MDF or wood. If you're working with MDF skirting, check our guide on the best paints for MDF for specific primer recommendations.
Apply primer evenly across the entire surface. Let it dry completely - oil-based primers need 24-48 hours, water-based primers need around 24 hours.
Test dryness by touching the surface lightly with your knuckle. If it feels cool or tacky, it needs more time. Primed boards that feel cool to the touch still contain moisture.
3. Painting application
Choose a high-quality paint in gloss, satin, or eggshell. Water-based paints dry faster and have less smell. Oil-based paints are more durable but take longer to dry.
1. First coat
Stir the paint thoroughly before starting. Load your brush with paint, then tap off excess against the inside of the tin - don't wipe the brush across the rim as this removes too much paint.
Start from one corner and work along the board in smooth, even strokes. Paint in the direction of the wood grain if you can see it. Keep a wet edge by overlapping each new stroke with the last one before it dries - this prevents lap marks.
Apply thin coats. Thick paint runs, drips, and takes longer to dry. Two or three thin coats create a better finish than one thick coat.
2. Drying times
Drying times vary by paint type:
- Oil-based paints - 8 to 24 hours between coats
- Water-based paints - 2 to 4 hours between coats
- Quick-dry formulas - 1 to 2 hours between coats
Humidity slows drying. Better ventilation speeds it up. Warmer rooms dry faster than cold ones. Thick paint takes longer than thin coats.
3. Second coat
Once the first coat is completely dry, lightly sand with 220-grit paper to create a smooth surface. Wipe away dust with a tack cloth, then apply the second coat using the same technique.
Most paints need two coats for proper coverage. Dark colours painted over light backgrounds might need three.
4. Final details
Pay attention to edges and corners - these areas often need extra care. Remove masking tape while the final coat is still slightly tacky to prevent paint lifting away with the tape.
Once everything is dry, inspect for missed spots or drips. Touch up as needed.
Protecting walls and floors
You have two main options for keeping paint off walls and floors: masking tape or cutting in. Most people find masking tape easier, especially on the first attempt.
Using masking tape
Use low-tack painter's tape along the wall where it meets the skirting board. Low-tack tape won't pull paint off the wall when you remove it. Press the tape down firmly to stop paint bleeding underneath.
For floor protection, you can tape along the bottom edge of the skirting, slide cardboard into the gap between floor and board, or use specialist carpet protection film.
Cutting in
Cutting in means painting a clean line freehand without tape. It takes practice but creates neater results once you've got the technique.
Hold your brush like a pencil, gripping near the bristles for better control. Load the brush lightly - too much paint causes drips. Work slowly along the edge, keeping the long edge of the angled brush parallel to the wall.
Most people find it easier to cut in after a few practice attempts on test areas first.
Specific scenarios
Painting with carpet down
Carpet fibres touching the base of skirting boards make protection harder. You'll need specific techniques to avoid paint transfer.
Protecting carpets when painting skirting guide →Painting over gloss
Glossy surfaces on old skirting boards need more thorough sanding and specific cleaning to let new paint grip properly. The preparation differs from bare wood.
Painting over gloss skirting guide →Things that make the job easier
- Paint in natural light when possible. Artificial light hides imperfections that become obvious later.
- Keep good ventilation for faster drying and safety, especially with oil-based paints.
- Check your work from different angles to spot thin patches or drips you might miss looking straight on.
- Wrap brushes in cling film between coats if you're taking a break. This stops them drying out without needing a full clean.
- Pour paint into a smaller container rather than working from the tin. This prevents contaminating your paint supply with dust or debris from the brush.
- Fill any gaps or holes with wood filler before you start. Sand these smooth once dry - they'll be much more obvious once you paint over them.
Getting it right
Painting skirting boards well comes down to patient preparation and thin coats. The actual painting takes less time than the prep work, but that preparation determines how good the finish looks and how long it lasts.
Take time with cleaning and sanding. Use proper brushes for your paint type. Apply multiple thin coats rather than one thick one. These basics prevent most common problems.
For specific situations like painting with carpet down or over existing gloss, the specialist guides linked throughout this article cover the extra steps needed.
The finish you get depends more on preparation than painting skill. Get the surface right and the paint will go on well.