Dado Rail On Stairs | Easier Than You Think | Skirting World
Posted by Sultan Khan on 29th May 2025
Find out how to install dado rails on stairs with our step-by-step guide. We'll walk you through measuring, calculating angles, and achieving a perfect fit along your staircase.
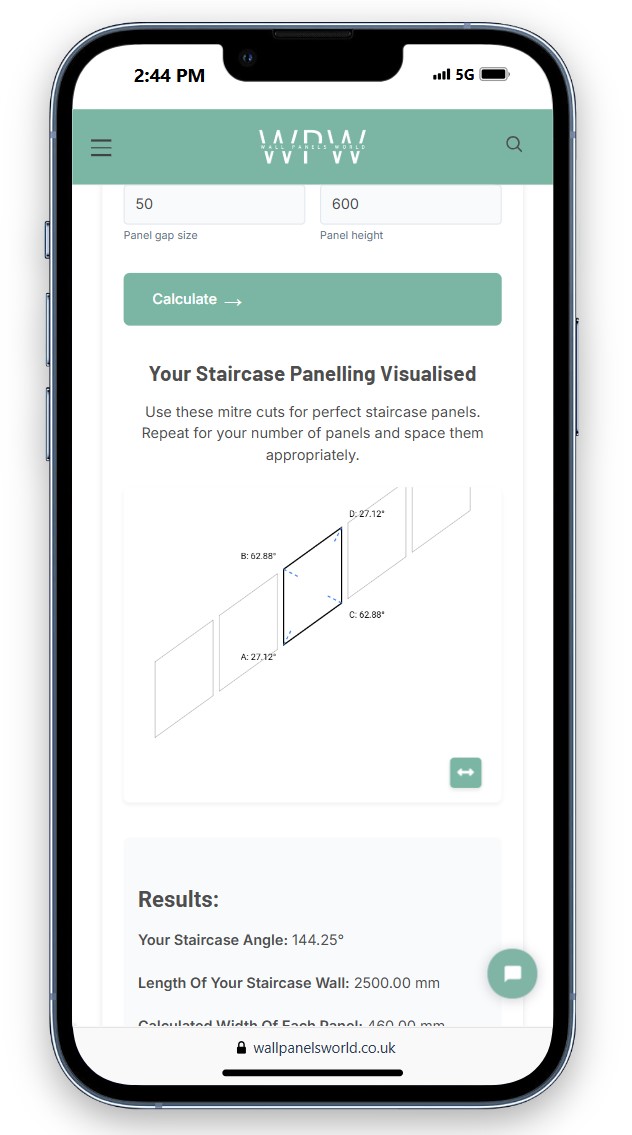
Don't miss: Check out our Staircase Panelling Visualiser and Calculator on our sister site Wall Panels World. Visualise your staircase design and calculate precise angles for a flawless finish.
Overview: Fitting Dado Rail on Stairs
Fitting a dado rail on stairs involves a series of interconnected steps. Each step builds on the previous one, so it's important to follow them in order and make notes as you go along. Here's a quick rundown of the process ahead:
- Measure your stairs (rise and run)
- Calculate the stair angle
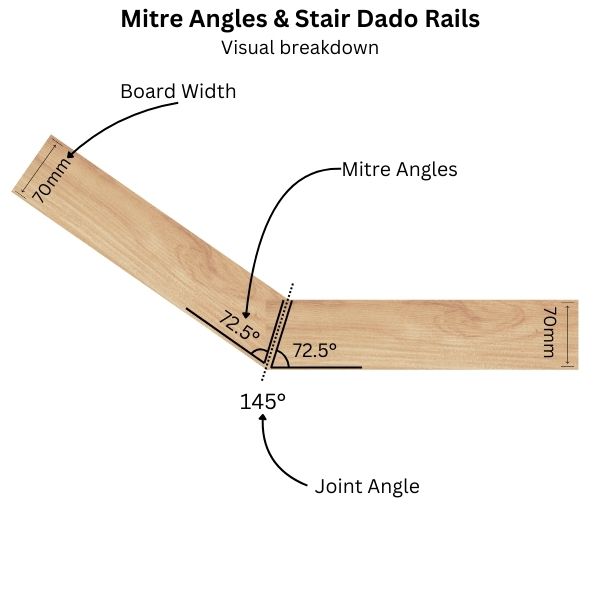
- Determine the mitre angle for joints
- Choose the right height for your dado rail
- Mark guidelines on the wall
- Cut and fit your dado rail
Let's dive into each step, seeing how they connect to create a perfectly fitted dado rail.
1. Measuring Your Stairs
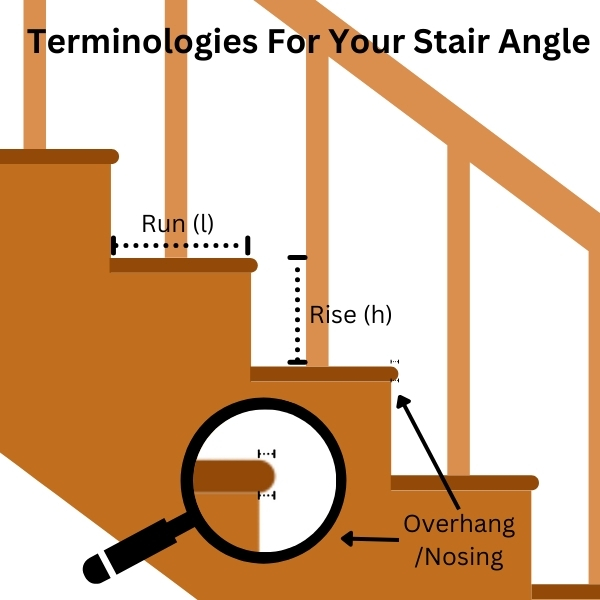
The first step is to measure the rise and run of step from your staircase. We'll use these two measurements for calculating the angle of your staircase. If you already know the angle of your staircase, you can move to step 3. These measurements will be crucial for all subsequent calculations.
There are many ways to determine the angle of a staircase, this is one of the easiest, provided that all of your steps are the same dimension.
Rise
The vertical height from the top of one step to the top of the next
Run
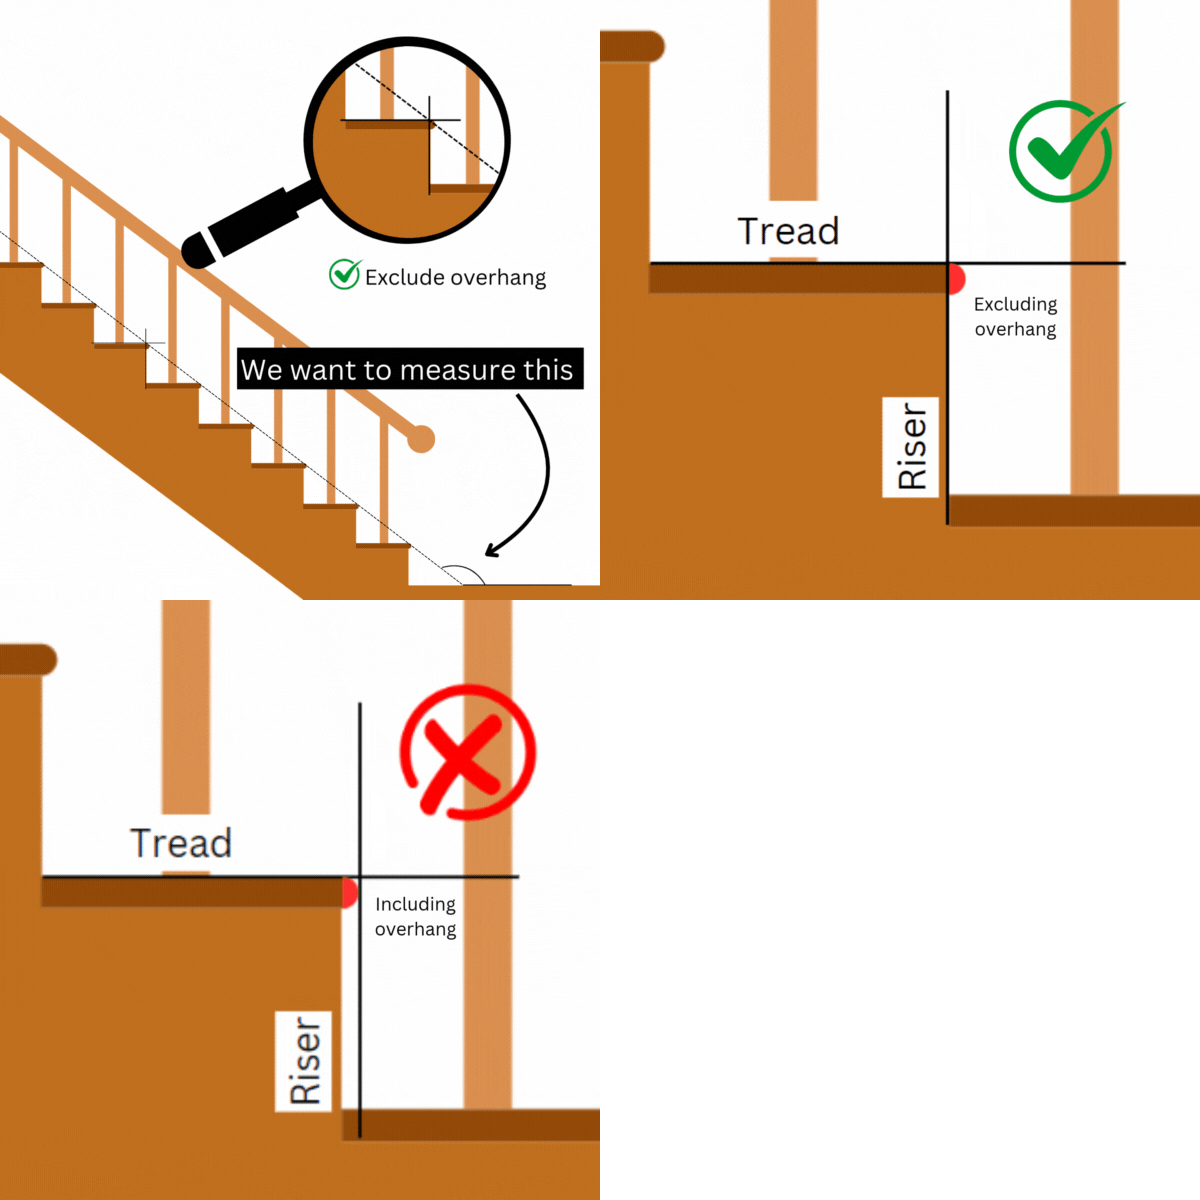
The horizontal distance from the edge of one step to the edge of the next (excluding any overhang)
How to measure:
- For the rise: Use a tape measure from the top surface of one step straight up to the top surface of the step above.
- For the run: Measure from the front edge of one step to the end where it meets the riser of the next step. Measure the full length and then measure the overhang to subtract it from the total length, this will give you the true length of your run.
Building regulations dictate that the rise should be between 150mm - 220mm, and the run between 220mm - 300mm.
Note: The tread overhang doesn't factor into these measurements. Focus on the main structure of the stairs.
2. Calculating the Stair Angle
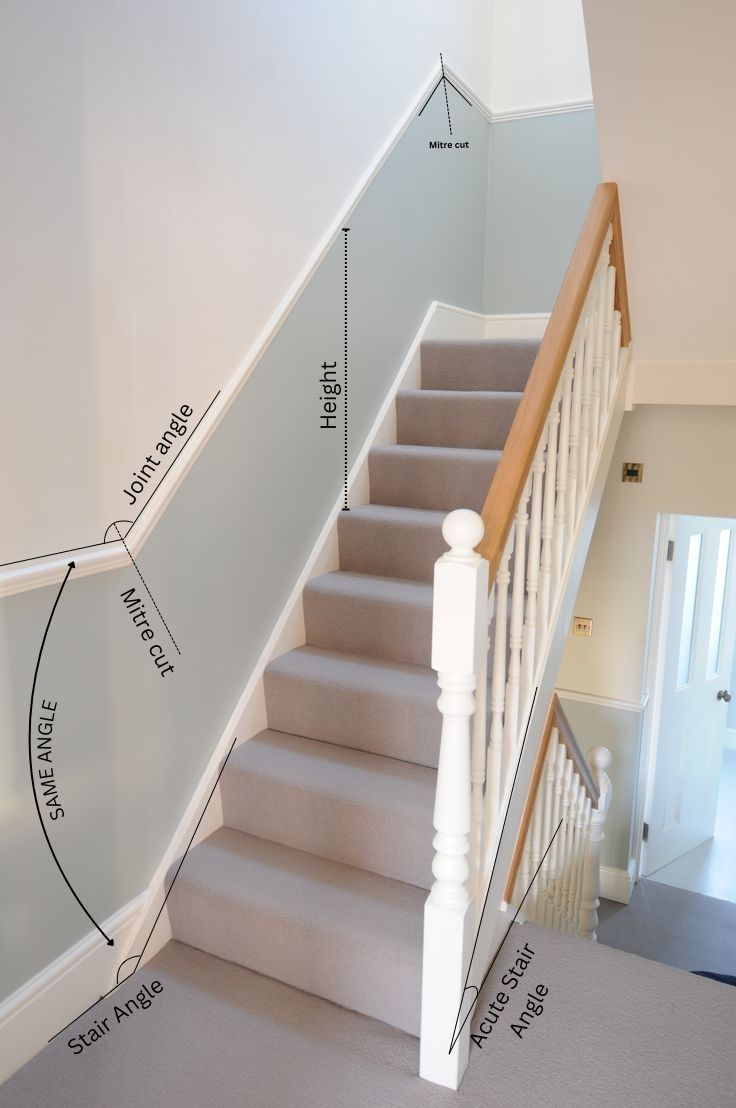
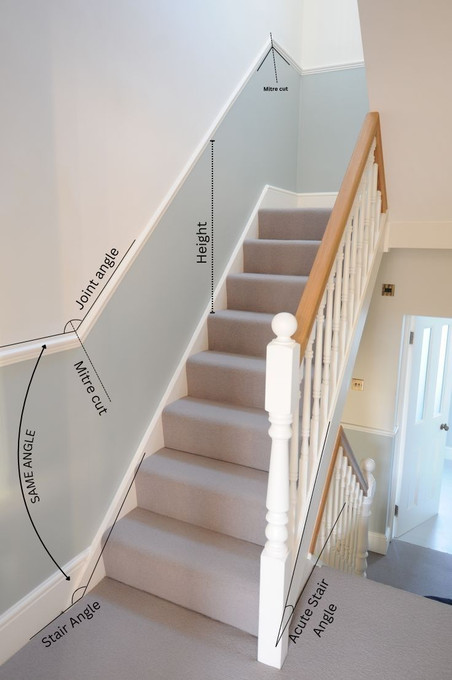
Now that we have our measurements, we can calculate the stair angle. This angle is crucial for determining how your dado rail will sit against the wall, we want our dado rail to angle up the wall at the same angle as your staircase.
Stair Angle Calculator
Calculate the angle of your stairs and the required joint angle for dado rails
Manual Calculation:
- Divide the rise by the run (e.g., if rise = 20 cm and run = 25 cm, then 20 ÷ 25 = 0.8)
- Use the arctangent (tan⁻¹) function on a scientific calculator: tan⁻¹(0.8) ≈ 38.7 degrees
Stair angles vary from home to home, but in general, your stair angle should be roughly around 34 - 37 degrees, and no more than 42 degrees, this means your joint angle should be around 145 degrees and no steeper than 138 degrees.
The joint angle from the above calculator will be used in the next step to calculate your mitre / cutting angle.
3. Finding the Mitre Angle
The mitre angle is what you'll use to cut your dado rail pieces so they fit perfectly at the joints in order to angle them up the staircase wall. This step involves two parts:
- Joint angle: You can find this in the calculator above. Manually this is simply 180° minus your stair angle. For example, if your stair angle is 38.7°, your joint angle would be 180° - 38.7° = 141.3°.
- Board widths: This is the width of your dado rail (Not the thickness or length). The calculator below will require Board A and Board B widths, measure the width of your dado rail and use this measurement for both board angles.
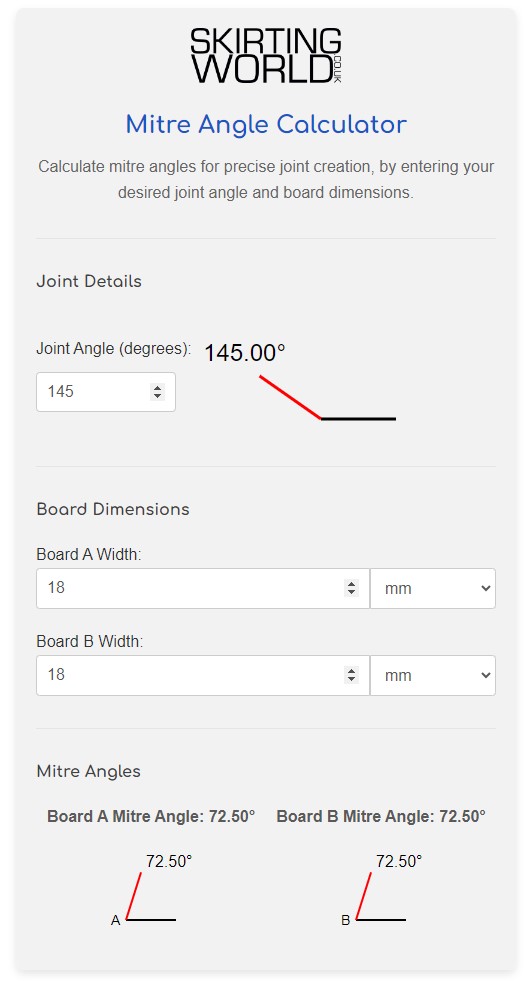
Now, use our Mitre Angle Calculator to find the correct mitre angle:
Enter the joint angle you calculated and use the same measurement for both board angles. The calculator will give you the correct mitre angle for cutting your dado rail at the point where they angle upwards.
4. Choosing the Right Dado Rail Height
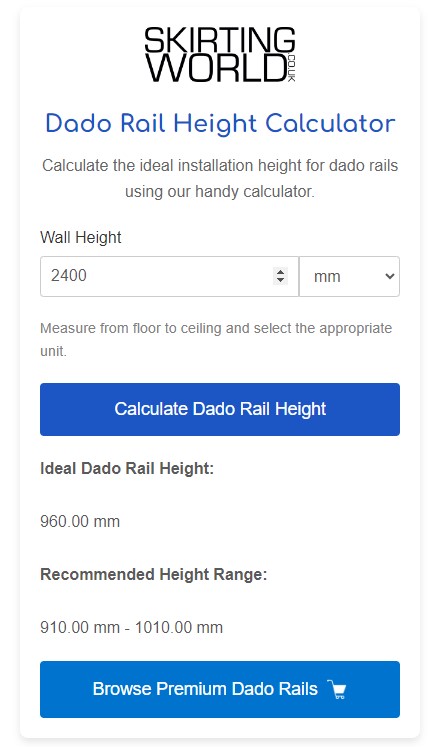
The height of your dado rail should be consistent from your hallway or landing onto the stairs. To find the ideal height, use our Dado Rail Height Calculator, for wall height, enter the height of the wall preceding your staircase, this might be the hallway or landing area, alternatively enter the height of your standard walls for consistency around the house:
You don't have to use this calculator. If you have already chosen the height of your dado rail, simply use this measurement.
5. Marking Guidelines on the Wall
With your measurements and calculations complete, it's time to mark your guidelines. You'll need:
- A tape measure
- A spirit level
- A pencil
- A long straight edge or chalk line
Follow these steps to mark your guidelines:
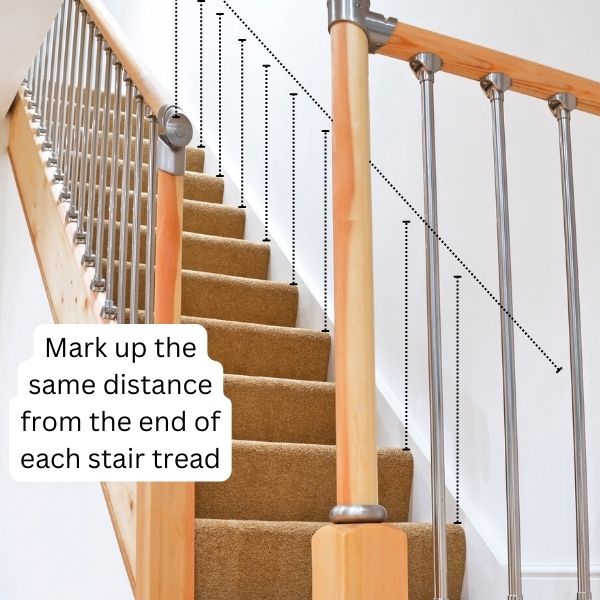
- Start at the bottom of the stairs, where your dado rail will begin to angle upwards. This is typically at the point where the bottom step meets the floor.
- Measure up from the floor to your chosen dado rail height (e.g., 96 cm) and make a mark on the wall.
- Move to each step, measuring the same height from the tread and marking the wall.
- Use your spirit level to ensure each mark is level with the corresponding tread.
- Connect these marks with a straight line using your straight edge or chalk line to create your guideline.
6. Cutting and Fitting Your Dado Rail
Now you're ready to cut and fit your dado rail:
- Cut your dado rail pieces to length.
- Use the mitre angle you calculated earlier to cut the ends of each piece where they'll join, you can use the mitre angle calculator for all the joints, to ensure precise angles.
- Test fit your pieces along the guideline you marked.
- Once you're happy with the fit, secure the dado rail to the wall using appropriate fixings.
For detailed instructions on attaching your dado rail to the wall, check out our comprehensive dado rail fitting guide.
Don't overthink it!
Fitting a dado rail on stairs might seem challenging at first, but by following these steps, you can achieve a professional-looking result.
- Your stair measurements inform your angle calculations
- Your angle calculations determine your cutting angles
- Your chosen height guides your wall markings
- Your wall markings direct your fitting process
Take your time with each step, double-check your calculations, and soon you'll have a beautifully installed dado rail enhancing your staircase!
If you need any dado rails or accessories for your project, don't forget to check out our range:

