How To Caulk Skirting Boards | 6 Steps | Buy Caulk | Free Delivery
Posted by Lee Watkinson on 15th Apr 2025
Tools & Materials
If you already have your skirting board, you only need two tools to start caulking:
- Caulking cartridge or tube - we recommend acrylic sealant for flexibility and water resistance. Look for a brand that's paintable and crack-resistant.
- Caulking gun - also called sealant or silicone gun. This applies the caulk smoothly and evenly.
-

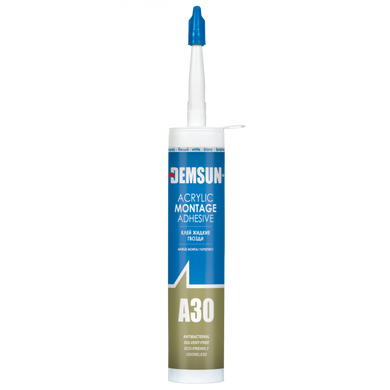
Demsun A30 Adhesive 310ml
The A30 Nail Free Adhesive by Demsun is perfect to use when fitting our skirting and architraves. Features: Over-paintable Suitable for use in all weather conditions 310ml tube White in colour Super strong adhesion Technical...£4.16 (Ex. VAT) -

RTRMAX Silicone Gun Aluminium trigger
This Silicone Gun by RTRMAX is the perfect tool for use with our range of Demsun products (up to 400ml tubes). Features: Robust, yet lightweight Heavy duty metal carriage Compatible with our Demsun products in max. 400ml tubes Aluminium...£4.16 (Ex. VAT)
How To Caulk Skirting Boards
Step 1 - Prepare the Area
- Before applying any caulk to your skirting, you're going to need to clean the area where the skirting board meets the wall with a damp cloth. Remove any dirt or dust so the caulk can adhere properly.
Note: be sure to check out our accessories where you'll find our caulk options.
- Ensure the area is completely dry before caulking. Wet surfaces prevent proper bonding.
Step 2 - Apply Caulk
- Load the caulk cartridge into the caulking gun. Clip off the nozzle tip.
- Run a steady 45° angle bead of caulk along the gap between the skirting and wall.
- Don't apply too much! You can always add more if needed after it cures.
Step 3 - Smooth the Bead
- Once applied, run a wet finger or damp sponge along the caulk bead.
- Apply light pressure to push the caulk into the gap and smooth the surface. Eliminate any bumps or ridges.
- Wipe excess caulk away with a dry cloth for a clean finish.
Step 4 - Allow Proper Curing Time
- Let the caulk fully cure before painting or adding more. This prevents shrinkage or cracks.
- Most caulks need 24 hours. Verify the curing time for your specific product.
Step 5 - Add More Caulk if Needed
- Inspect once fully cured. If there are any thin spots or voids, apply additional caulk.
- Smooth and wipe away excess once more. Allow to fully cure again.
Step 6 - Paint the Caulked Surface
- Once cured, paint the caulked areas with trim paint or wall paint to blend seamlessly.
- If gaps are very small, painting the same colour as your skirting boards hides them well.
- For larger gaps, match the wall colour instead to fully conceal.
Best Caulk For Skirting Boards
As a manufacturer and supplier, it goes without saying that we have the ideal caulk for skirting boards.
Really, most caulks will do the job - you don't have to look for anything too specific.
Ideally, you'd choose something that remains elastic after curing. This means it is less likely to crack over time.
Most are also waterproof once cured (yay for cleaning!) and you can paint over them too.
Have a browse through our accessories page to see our tried-and-tested caulks and caulk guns, we trust these brands and products and recommend them for those caulking skirting boards and interior mouldings.
| Caulk vs Silicone | |
|---|---|
| Caulk Adhesive | Silicone Adhesive |
Advantages of Caulk Adhesive:
Disadvantages of Caulk Adhesive:
|
Advantages of Silicone Adhesive:
Disadvantages of Silicone Adhesive:
|
Frequently Asked Questions
What Is The Best Caulk For Skirting Boards?
Silicone Or Caulk Around Skirting Boards?

Lee Watkinson
Digital Marketing Director at Skirting World with 10 years of experience in Home Interiors & Manufacturing.


